“You don’t need yeast or fancy steps to make a loaf of bread that feels like a warm hug,” my neighbor had said one chilly afternoon while handing me a slice of her homemade brown bread. I was skeptical—my past attempts at bread-making usually involved a lot of waiting, kneading, and occasional frustration. But that day, with the scent of freshly baked bread filling the kitchen, I realized how wrong I was.
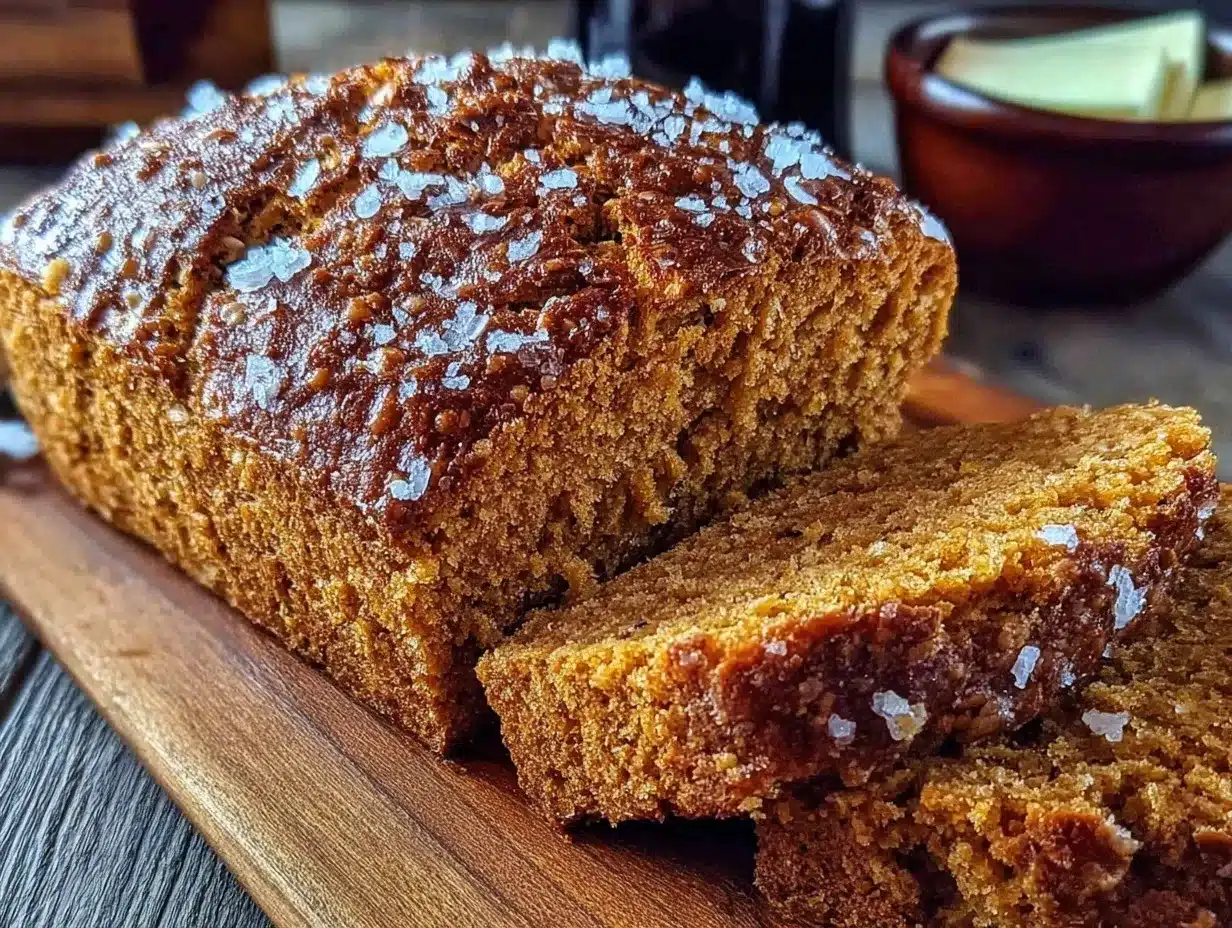
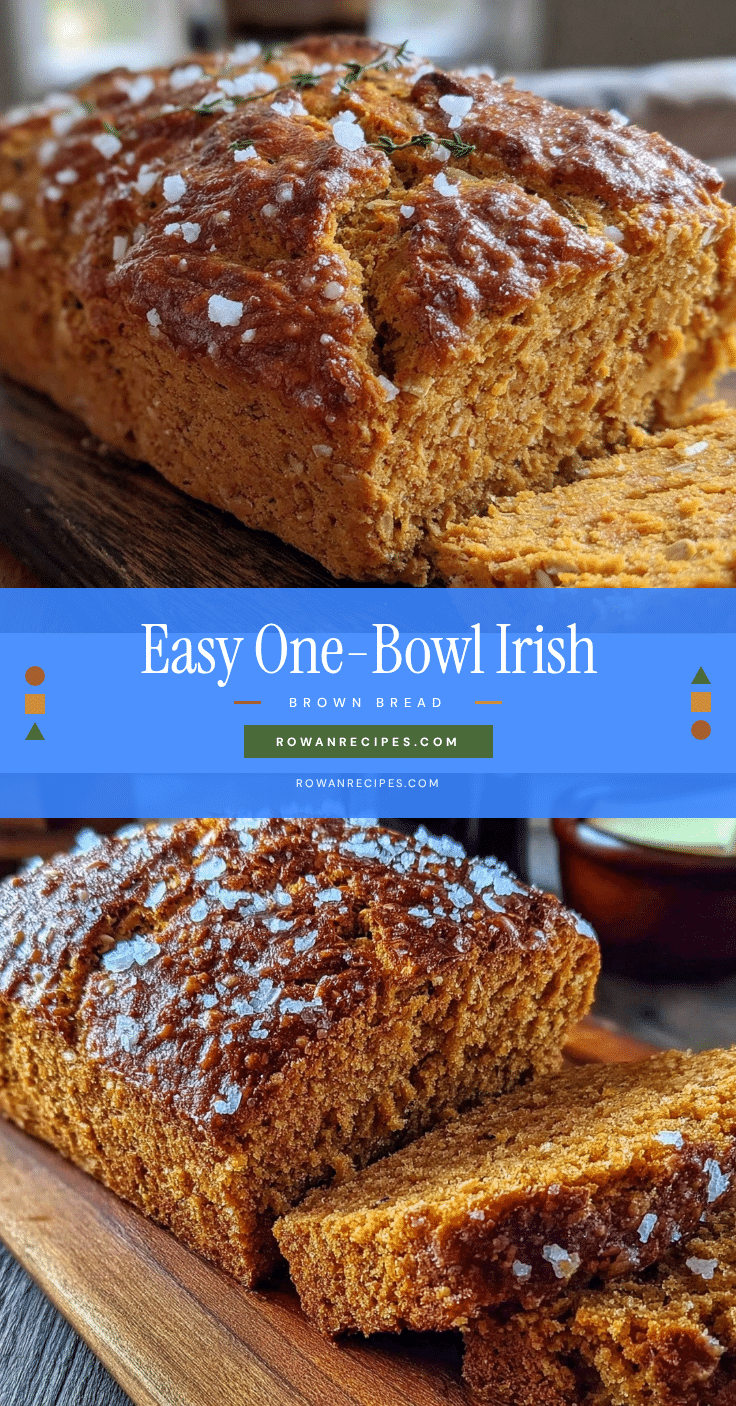
This Easy One-Bowl Irish Brown Bread No Yeast No Knead recipe came into my life almost by accident. I’d been craving something hearty and homemade but didn’t have the patience for the usual yeast-rise drama. One lazy weekend, I threw together some simple ingredients in a single bowl, mixed them up, and popped the dough into the oven. The crust came out perfectly crisp, and the crumb was satisfyingly dense without being heavy—a texture I honestly didn’t expect.
Since then, this bread has become my go-to for quiet mornings, paired with butter and jam, or alongside a bowl of soup on a cozy night. It’s the kind of bread that invites you to slow down, to savor the simple stuff. No fuss, no fancy equipment, just honest ingredients coming together in the best way. I still remember the first time I sliced into it—the smell, the soft crumb, and that tiny moment of pride that maybe, just maybe, I could bake bread without the usual hassle. That’s why this recipe stuck with me, and I hope it will find a place in your kitchen too.
Why You’ll Love This Recipe
This Irish brown bread isn’t just easy—it’s something I’ve tested countless times to make sure it works every single time, even if you’re not a baker. Here’s why it stands out:
- Quick & Easy: Comes together in under 10 minutes and bakes in about 40. Perfect for when you want fresh bread without the wait.
- Simple Ingredients: No yeast, no kneading—just pantry staples like whole wheat flour, baking soda, and buttermilk (or a simple milk and vinegar swap).
- Perfect for Any Occasion: Whether it’s a weekend breakfast, a casual dinner side, or a last-minute addition to a potluck, this bread fits in effortlessly.
- Crowd-Pleaser: The nutty, hearty flavor gets rave reviews. I’ve served it alongside everything from creamy soups to hearty stews, and it always disappears fast.
- Unbelievably Delicious: The crust has just the right crunch, and the interior is soft but substantial—this isn’t your everyday sandwich bread.
What really sets this recipe apart is the no-yeast, no-knead method paired with a single-bowl prep. It’s about making bread approachable. Plus, the balance of whole wheat and white flours means it’s wholesome without being dense and heavy. I’ve also played with adding oats or seeds on top for texture, but the classic version remains a favorite.
Honestly, this bread feels like a little act of self-care—something you can whip up on a whim and enjoy fresh without the hassle. It’s comforting, simple, and just right for those moments when you want homemade without the stress.
What Ingredients You Will Need
This recipe calls for straightforward, wholesome ingredients that come together to create that distinct Irish brown bread flavor and texture. Most of these are pantry staples, so no special grocery runs required.
- Whole Wheat Flour (1 ½ cups / 190 g) – Provides hearty flavor and texture. I like King Arthur for consistent results.
- All-Purpose Flour (1 ½ cups / 180 g) – Balances the density of the whole wheat for a lighter crumb.
- Baking Soda (1 teaspoon) – The leavening agent that replaces yeast and gives the bread its rise.
- Baking Powder (1 teaspoon) – Works alongside baking soda for a gentle lift.
- Salt (1 teaspoon) – Enhances flavor and balances the sweetness of the flour.
- Buttermilk (1 ¾ cups / 420 ml) – Reacts with the baking soda to create the tender crumb. If you don’t have buttermilk, use milk with 1 tablespoon of lemon juice or vinegar added (let it sit 5 minutes).
- Brown Sugar (optional, 1 tablespoon) – Adds a subtle sweetness that complements the nuttiness of the flours.
- Rolled Oats (optional, ¼ cup / 20 g) – For sprinkling on top before baking to add a rustic touch.
Feel free to swap out the all-purpose flour for a gluten-free blend if you want a gluten-free version, although texture may vary a bit. For a nuttier loaf, adding sunflower seeds or flaxseeds is a great option. When I’m short on buttermilk, the milk and vinegar trick always saves the day without changing the flavor.
Equipment Needed
This recipe is wonderfully low-fuss when it comes to equipment. Here’s what you’ll need:
- Large Mixing Bowl: One bowl is all it takes—no separate bowls for dry and wet ingredients. I like a glass or ceramic bowl for easy mixing and cleanup.
- Wooden Spoon or Silicone Spatula: For mixing the batter. You want something sturdy enough to handle thick dough.
- Baking Sheet or Cast Iron Skillet: Either works great. A cast iron skillet adds a nice crust if you have one (just be sure it’s oven-safe).
- Parchment Paper: Lining the baking sheet prevents sticking and makes cleanup easier.
- Measuring Cups and Spoons: Accuracy matters for baking, so use a good set. I recommend using a kitchen scale if possible for flour measurement precision.
If you don’t have a cast iron skillet, a heavy-duty baking sheet or even a Dutch oven with the lid off will do just fine. The key is a hot oven and a sturdy pan to get that crust going. I’ve tried this bread in a bread machine pan for baking only, and it works okay but lacks the rustic shape I love.
Preparation Method
- Preheat your oven: Set to 375°F (190°C). Position your oven rack in the center for even heat. This usually takes about 10-15 minutes.
- Mix dry ingredients: In your large bowl, combine 1 ½ cups (190 g) whole wheat flour, 1 ½ cups (180 g) all-purpose flour, 1 teaspoon baking soda, 1 teaspoon baking powder, and 1 teaspoon salt. Stir thoroughly to blend the leavening evenly.
- Add sugar (optional): If using, stir in 1 tablespoon brown sugar now to distribute sweetness evenly.
- Pour in buttermilk: Measure 1 ¾ cups (420 ml) buttermilk and add it to the dry mix. Use a wooden spoon or spatula to gently fold everything together until just combined. The dough will be thick and sticky but not wet. Be careful not to overmix; a few dry spots are okay.
- Shape the dough: On a lightly floured surface, turn out the dough and pat it into a rough round about 7 inches (18 cm) in diameter and 1 ½ inches (4 cm) thick. Don’t knead—just shape gently.
- Transfer to baking sheet: Line your baking sheet with parchment paper and place the dough round on top. If using rolled oats, sprinkle about ¼ cup (20 g) evenly over the surface for a rustic finish.
- Score the top: Using a sharp knife, cut a deep cross about ½ inch (1.3 cm) deep into the dough. This helps the bread cook evenly and adds that classic Irish look.
- Bake: Place the baking sheet in the oven and bake for 35-40 minutes. The bread should be golden brown on top and sound hollow when tapped on the bottom. Use a thermometer if you have one—the internal temperature should hit around 200°F (93°C).
- Cool: Remove from oven and let the bread cool on a wire rack for at least 20 minutes before slicing. This step is important to allow the crumb to set.
If the crust browns too fast, tent the bread loosely with foil halfway through baking. The smell of bread baking is pretty irresistible, so keep a firm grip on those slices once cooled!
Cooking Tips & Techniques
Getting great results with this no-yeast bread is easier than you’d think, but a few things can make a big difference:
- Don’t skip the buttermilk: It’s the acid that reacts with baking soda to give the bread its lift and tender crumb. If you forget, your bread will be dense and flat.
- Mix gently: Overmixing develops gluten and makes the bread tough. Stir just until the dry is mostly moistened.
- Score the dough deeply: That cross on top isn’t just traditional—it helps steam escape and the loaf to rise properly during baking.
- Use a hot oven and preheat well: A properly preheated oven sets the crust quickly, locking in moisture inside.
- Test doneness by sound: Tap the bottom of the loaf; it should sound hollow. If not, bake a few minutes longer.
- Let it cool fully: Cutting too soon makes the crumb gummy and sticky. Patience pays off here.
One time, I skipped scoring the bread and ended up with a loaf that cracked unpredictably—lesson learned! Also, swapping out the buttermilk for regular milk without acid led to a dense, disappointingly flat bread. Those little details matter. I keep a bottle of vinegar handy for those last-minute buttermilk substitutes—it’s a lifesaver.
While this bread is quick, multitasking helps—get your sides or creamy cheesy taco pasta ready while the bread bakes. That way, dinner comes together smoothly and deliciously.
Variations & Adaptations
One of the best things about this bread is how easy it is to tweak for different tastes or dietary needs:
- Gluten-Free Version: Use a gluten-free flour blend in place of the wheat flours and add 1 teaspoon xanthan gum for structure. The texture will be slightly different but still tasty.
- Seeded Bread: Mix in ¼ cup sunflower seeds or flaxseeds into the dough for extra crunch and nutrition. Toasting seeds first adds a nice depth of flavor.
- Herb-Infused: Add 1 tablespoon chopped fresh herbs like rosemary or thyme to the dry ingredients for a fragrant twist. This pairs beautifully with soups or Italian sausage and peppers.
- Dairy-Free Option: Swap buttermilk for almond or oat milk mixed with 1 tablespoon lemon juice. The crumb will be slightly less tender but still quite good.
- Sweetened Variation: Add ½ cup dried cranberries or raisins and increase brown sugar to 2 tablespoons for a bread that’s great with tea or breakfast spreads.
I once tried adding grated cheddar and chives to the dough—served warm with butter, it was a hit at a family brunch. Feel free to experiment based on what you have on hand or your flavor preferences.
Serving & Storage Suggestions
This bread is best served warm or at room temperature. I love slicing it thick and spreading with salted butter and a drizzle of honey for breakfast. It also pairs perfectly with soups, stews, or a simple cheese board.
To store, wrap the cooled loaf tightly in plastic wrap or place it in an airtight container. It stays fresh on the counter for 2-3 days. For longer storage, slice and freeze; toast slices directly from the freezer to refresh the crust.
If you want to reheat, pop slices in a toaster or oven at 350°F (175°C) for 5-8 minutes. This brings back the crust’s crunch and makes the crumb soft again. Over time, the flavors deepen, so leftovers are even better the next day.
Pairing this bread with a warm bowl of stuffed pepper soup or a creamy pasta dish makes for a comforting meal that feels homemade and satisfying.
Nutritional Information & Benefits
One slice (about 60 g) of this Irish brown bread contains approximately:
| Calories | 150 kcal |
|---|---|
| Carbohydrates | 28 g |
| Protein | 5 g |
| Fat | 1.5 g |
| Fiber | 3 g |
The whole wheat flour provides a good dose of fiber and nutrients, which supports digestion and sustained energy. The simple ingredients mean no added preservatives or artificial flavors.
This bread is naturally low in fat and contains no added sugar unless you choose to add brown sugar or dried fruit. It’s also free from yeast, making it a great option for those sensitive to yeast products.
From a wellness standpoint, this recipe strikes a nice balance between nourishing and satisfying. It’s a wholesome way to enjoy fresh bread without the heaviness of some dense whole grain loaves.
Conclusion
This Easy One-Bowl Irish Brown Bread No Yeast No Knead recipe has become a quiet staple in my kitchen for good reason. It’s simple, reliable, and honestly tastes like you put in way more effort than you actually did.
I encourage you to make it your own—try the variations, serve it with your favorite soups or mains, and enjoy the process of creating something homemade without stress. For me, it’s the kind of bread that turns everyday moments into something a little more special.
Give it a shot and see how easy bread can be. And if you want some inspiration for meals to go with it, check out my creamy garlic butter Tuscan shrimp pasta or the easy crispy sheet pan Italian sausage and peppers. Both pair beautifully with fresh, crusty bread like this.
FAQs
Can I use regular milk instead of buttermilk?
Yes! Just add 1 tablespoon of lemon juice or vinegar to 1 ¾ cups (420 ml) of milk and let it sit for 5 minutes before using. This homemade buttermilk substitute reacts with the baking soda to help the bread rise.
Is this bread suitable for gluten-free diets?
You can make a gluten-free version by substituting the flours with a gluten-free blend and adding 1 teaspoon xanthan gum for structure. The texture will differ slightly but will still be delicious.
How long does this bread keep fresh?
Stored at room temperature in an airtight container or wrapped tightly, it stays fresh for 2-3 days. For longer storage, slice and freeze. Toast slices straight from the freezer to refresh.
Can I make this bread ahead of time?
Because this bread is best fresh, it’s ideal to bake it the day you plan to serve it. However, you can prepare the dough and bake later, or freeze baked slices for convenience.
What can I serve with Irish brown bread?
This bread pairs wonderfully with soups, stews, cheeses, or as a side to dishes like creamy cheesy taco pasta. It’s also delicious simply toasted with butter and jam.
Pin This Recipe!
Easy One-Bowl Irish Brown Bread No Yeast No Knead Recipe for Perfect Homemade Loaf
A simple, no-yeast, no-knead Irish brown bread recipe that comes together in one bowl and bakes into a crusty, hearty loaf perfect for any occasion.
- Prep Time: 10 minutes
- Cook Time: 40 minutes
- Total Time: 50 minutes
- Yield: 8 servings 1x
- Category: Bread
- Cuisine: Irish
Ingredients
- 1 ½ cups whole wheat flour (190 g)
- 1 ½ cups all-purpose flour (180 g)
- 1 teaspoon baking soda
- 1 teaspoon baking powder
- 1 teaspoon salt
- 1 ¾ cups buttermilk (420 ml) or milk with 1 tablespoon lemon juice/vinegar (let sit 5 minutes)
- 1 tablespoon brown sugar (optional)
- ¼ cup rolled oats (20 g, optional, for sprinkling on top)
Instructions
- Preheat your oven to 375°F (190°C) and position the rack in the center.
- In a large mixing bowl, combine whole wheat flour, all-purpose flour, baking soda, baking powder, and salt. Stir thoroughly.
- If using, add brown sugar and mix evenly.
- Pour in the buttermilk and gently fold with a wooden spoon or spatula until just combined. Dough will be thick and sticky with some dry spots.
- Turn dough onto a lightly floured surface and shape into a rough 7-inch (18 cm) diameter round, about 1 ½ inches (4 cm) thick. Do not knead.
- Line a baking sheet with parchment paper and place the dough round on top. Sprinkle rolled oats evenly if using.
- Score a deep cross about ½ inch (1.3 cm) deep into the dough with a sharp knife.
- Bake for 35-40 minutes until golden brown and hollow sounding when tapped on the bottom. Internal temperature should reach about 200°F (93°C).
- Remove from oven and cool on a wire rack for at least 20 minutes before slicing.
Notes
Do not skip the buttermilk as it reacts with baking soda to give the bread lift. Mix gently to avoid tough bread. Score the dough deeply to help it rise properly. Let the bread cool fully before slicing to avoid gummy texture. Tent with foil if crust browns too fast.
Nutrition
- Serving Size: 1 slice (about 60 g)
- Calories: 150
- Fat: 1.5
- Carbohydrates: 28
- Fiber: 3
- Protein: 5
Keywords: Irish brown bread, no yeast bread, no knead bread, one bowl bread, easy homemade bread, whole wheat bread, quick bread