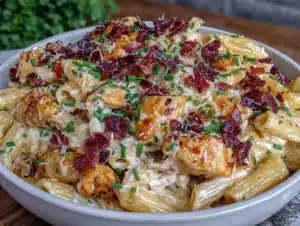
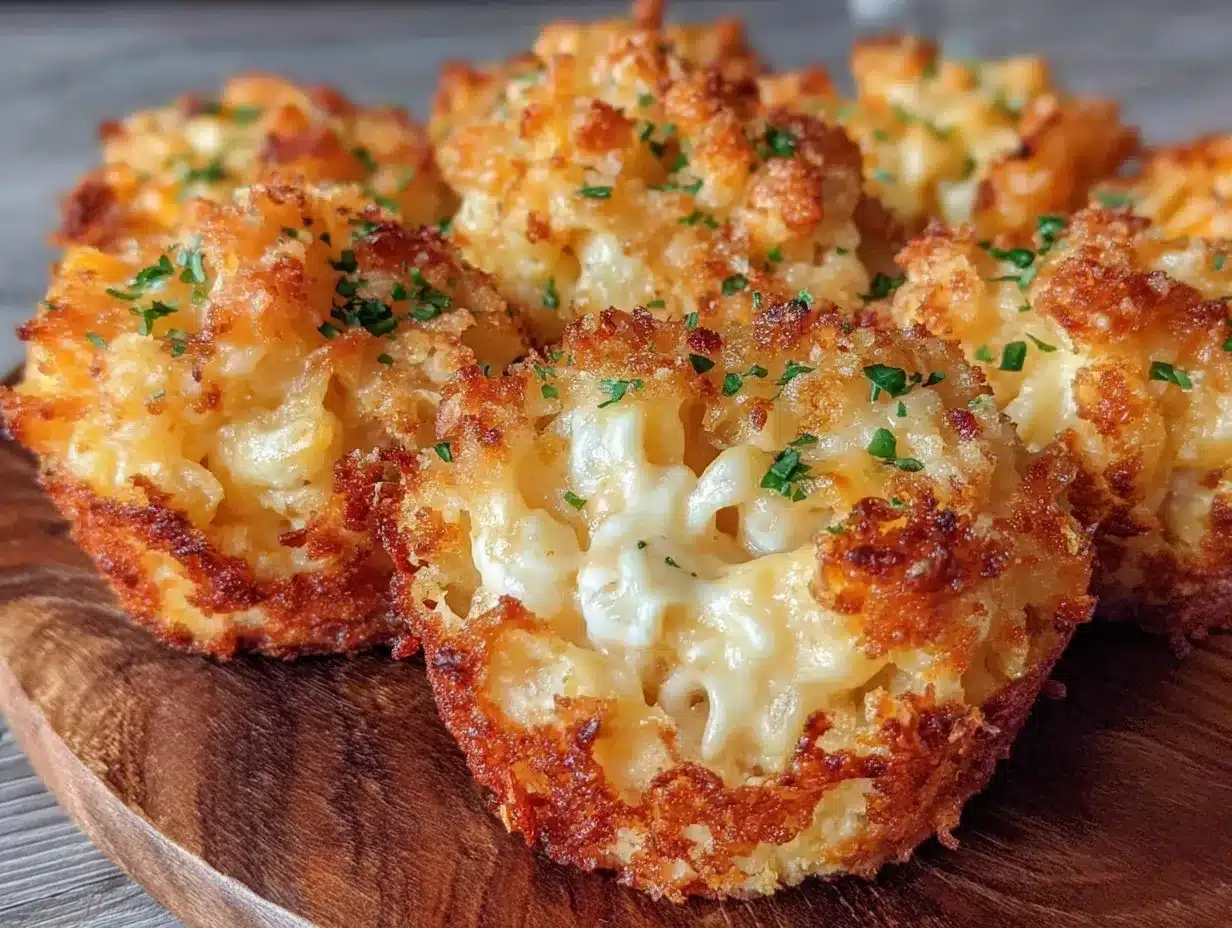
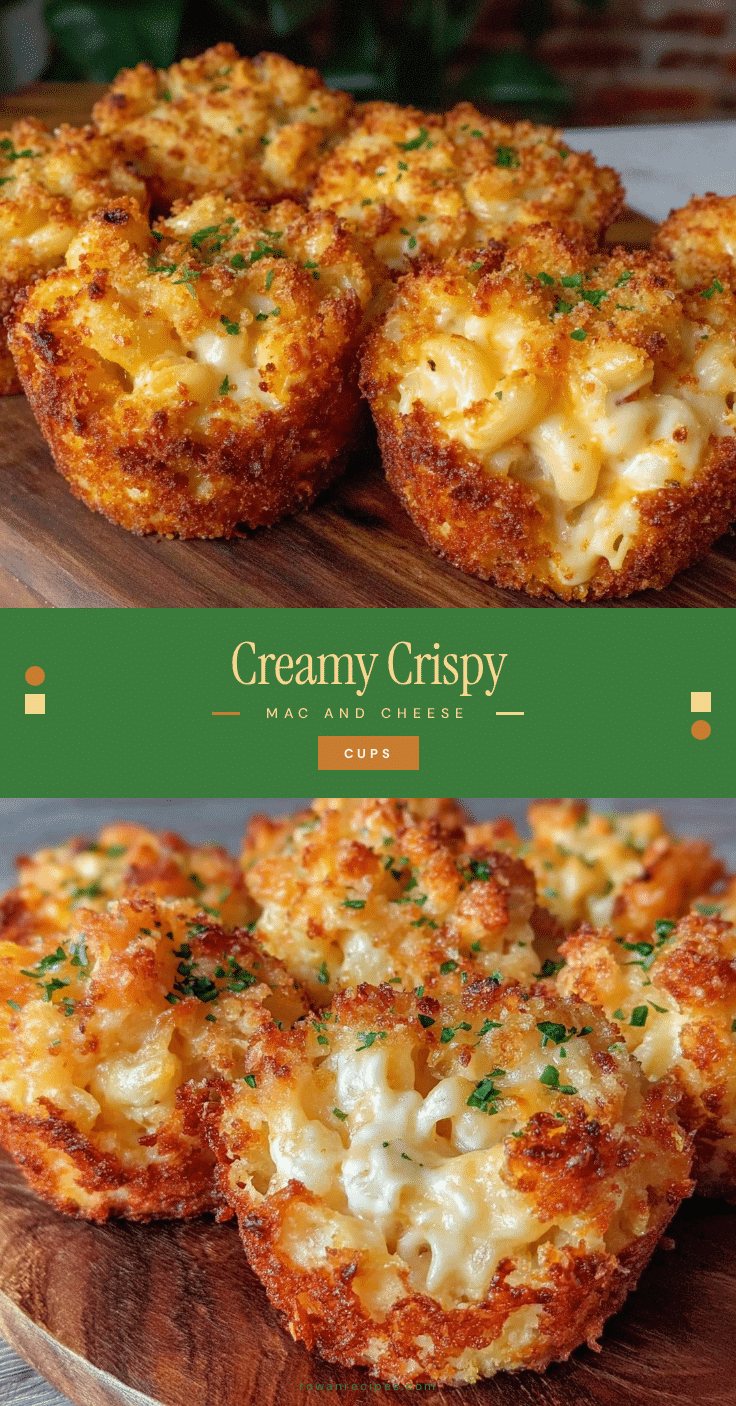
Let me tell you, the scent of bubbling cheese and toasted pasta wafting from my oven is enough to make anyone’s mouth water. The first time I baked these Crispy Mac and Cheese Cups with a creamy, cheesy center, I was instantly hooked—the kind of moment where you pause, take a deep breath, and just smile because you know you’re onto something truly special. Years ago, when I was knee-high to a grasshopper, my grandma would make her famous mac and cheese, but this crispy cup version? Honestly, it feels like a fun, playful twist I wish I’d discovered back then.
My family couldn’t stop sneaking them off the cooling rack (and I can’t really blame them). You know what makes these so dangerously easy? The crispy, golden crust hugging a luscious, gooey inside that tastes like pure, nostalgic comfort. Perfect for potlucks, a sweet treat for your kids, or just brightening up your Pinterest cookie board with a savory twist, these mac and cheese cups have become a staple at our family gatherings. I’ve tested this recipe multiple times—in the name of research, of course—and trust me, you’re going to want to bookmark this one.
Why You’ll Love This Recipe
Honestly, this Crispy Mac and Cheese Cups recipe is a game-changer, and here’s why:
- Quick & Easy: Comes together in under 30 minutes, perfect for busy weeknights or last-minute cravings.
- Simple Ingredients: No fancy grocery trips needed; you likely already have everything in your kitchen.
- Perfect for Any Occasion: Great for potlucks, kids’ lunches, game day snacks, or cozy dinners.
- Crowd-Pleaser: Always gets rave reviews from kids and adults alike—trust me, these disappear fast!
- Unbelievably Delicious: The texture and flavor combo is next-level comfort food with a crispy crust and creamy center.
What sets this recipe apart? It’s the way the pasta cups hold their shape perfectly, with a crunchy outside that gives way to a silky, cheesy inside. This isn’t just any mac and cheese; it’s the best version you’ll make at home—thanks to a little secret: mixing sharp cheddar with mozzarella for the ultimate ooey-gooey pull. You’ll close your eyes after the first bite, I promise. It’s comfort food reimagined—faster, with a crispy twist, but with all that soul-soothing satisfaction.
What Ingredients You Will Need
This recipe uses simple, wholesome ingredients to deliver bold flavor and satisfying texture without the fuss. Most of these are pantry staples, and substitutions are easy if needed.
- Elbow Macaroni: 2 cups (about 200g), cooked al dente (not mushy!)
- Unsalted Butter: 3 tablespoons, divided (adds richness and helps crisp)
- All-Purpose Flour: 3 tablespoons (for the roux that thickens the cheese sauce)
- Whole Milk: 2 cups (480ml), warmed (you can swap for dairy-free milk if needed)
- Sharp Cheddar Cheese: 2 cups shredded (about 200g) – I recommend Cabot for that perfect tang
- Mozzarella Cheese: 1 cup shredded (about 100g) – adds gooey stretch
- Parmesan Cheese: 1/2 cup grated (about 50g), for topping
- Garlic Powder: 1/2 teaspoon (for a subtle kick)
- Onion Powder: 1/2 teaspoon
- Salt & Black Pepper: To taste
- Panko Breadcrumbs: 1/2 cup (optional, for extra crunch)
- Cooking Spray or Additional Butter: For greasing the muffin tin
If you want to make it gluten-free, swap regular flour for a gluten-free blend and use gluten-free pasta and breadcrumbs. For a dairy-free option, try coconut or almond milk and dairy-free cheese alternatives. In summer, swapping in fresh herbs or a pinch of smoked paprika can add a nice twist. Trust me, these ingredients come together to create a perfectly balanced, crispy mac and cheese cup experience.
Equipment Needed
- Muffin Tin: Essential for shaping the mac and cheese cups. I use a standard 12-cup tin but mini muffin tins work great for bite-sized snacks.
- Mixing Bowls: For combining pasta and cheese sauce. Glass or stainless steel works best.
- Medium Saucepan: To make the cheese sauce (roux and milk mixture). Non-stick or heavy-bottomed pans help prevent scorching.
- Whisk: For smoothing out the roux and milk mixture.
- Measuring Cups and Spoons: Precision matters here for consistency.
- Spatula or Spoon: To mix the pasta with cheese sauce and transfer into tins.
If you don’t have a muffin tin, you can try using a silicone mold or even small ramekins, but baking times might vary. I’ve had success with budget-friendly muffin tins from local stores; just make sure to grease them well. Keeping your equipment clean and dry helps the cups release easily after baking—trust me, it’s a little trick I learned the hard way.
Preparation Method
- Cook the Pasta: Bring a large pot of salted water to a boil. Add 2 cups (200g) elbow macaroni and cook until al dente, about 6-7 minutes. Drain and rinse with cold water to stop cooking. Set aside and lightly toss with 1 tablespoon of butter to prevent sticking.
- Make the Cheese Sauce: In a medium saucepan, melt 2 tablespoons of unsalted butter over medium heat. Whisk in 3 tablespoons of all-purpose flour and cook for 1-2 minutes, stirring constantly until it turns a light golden color (this is your roux).
- Add Warm Milk: Slowly pour in 2 cups (480ml) warmed whole milk, whisking continuously to avoid lumps. Cook until the sauce thickens and coats the back of a spoon, about 4-5 minutes.
- Stir in Cheeses and Seasoning: Remove from heat and add 2 cups shredded sharp cheddar, 1 cup shredded mozzarella, garlic powder, onion powder, salt, and pepper. Stir until melted and smooth. Taste and adjust seasoning if needed.
- Combine Pasta and Cheese Sauce: Fold the cooked pasta into the cheese sauce until well coated.
- Prepare Muffin Tin: Preheat your oven to 375°F (190°C). Grease a 12-cup muffin tin with cooking spray or butter.
- Fill and Shape Cups: Spoon the mac and cheese mixture into each muffin cup, pressing down slightly with the back of the spoon to compact it. Sprinkle the tops with ½ cup grated Parmesan and, if using, ½ cup panko breadcrumbs for extra crispness.
- Bake: Bake for 20-25 minutes, or until the tops are golden brown and crispy. You’ll smell that irresistible toasted cheese aroma when ready.
- Cool Slightly and Serve: Let the cups cool in the tin for 5 minutes before carefully removing with a knife or small spatula. Serve warm for that creamy, cheesy center experience.
If you find the cheese sauce too thick, add a splash of milk before mixing with pasta. If the cups don’t release easily, run a butter knife gently around the edges. These little tricks make your life easier and the results better every time.
Cooking Tips & Techniques
Here are some pro tips to get your Crispy Mac and Cheese Cups just right:
- Don’t Overcook the Pasta: Al dente is key to avoid mushy cups. Rinsing with cold water stops the cooking process and cools the pasta for easier handling.
- Make a Smooth Roux: Stir the butter and flour constantly over medium heat to avoid lumps and burning. This base ensures a creamy cheese sauce.
- Use a Mix of Cheeses: Sharp cheddar adds flavor, mozzarella adds stretch, and Parmesan on top crisps up beautifully—trust me, this combo is magic.
- Press Firmly When Filling: Compacting the mixture into muffin cups helps them hold their shape and crisp up nicely.
- Watch the Baking Time: Overbaking dries them out; underbaking means the centers won’t be melty. Keep an eye from 20 minutes onward.
- Let Them Rest: Cooling briefly helps the cups set so they don’t fall apart when you remove them.
I once skipped pressing the mixture in and ended up with crumbly cups—lesson learned the hard way! Also, multitasking by prepping the sauce while the pasta cooks saves time. You’ll find these tips help you nail this recipe every time.
Variations & Adaptations
Let’s talk about switching things up a bit—you know, to keep it fresh and suit different tastes or needs:
- Spicy Kick: Add ½ teaspoon cayenne pepper or chopped jalapeños to the cheese sauce for a zesty twist.
- Veggie Boost: Mix in finely chopped cooked broccoli or roasted red peppers for extra color and nutrition.
- Gluten-Free Version: Use gluten-free pasta, gluten-free flour blend for the roux, and gluten-free breadcrumbs or crushed nuts for topping.
- Dairy-Free Option: Swap milk for unsweetened almond or oat milk, and use dairy-free cheese shreds—try brands like Daiya for meltability.
- Protein Power: Stir in cooked bacon bits, shredded rotisserie chicken, or even cooked sausage for a heartier snack.
Personally, I once tried adding sun-dried tomatoes and fresh basil—totally delicious and gave the cups a Mediterranean vibe. The recipe is forgiving, so feel free to experiment—you might find your new favorite!
Serving & Storage Suggestions
Serve these crispy mac and cheese cups warm, straight from the oven, for that perfect gooey center and golden crust. They’re fantastic on their own or paired with a simple green salad or tomato soup for a comforting meal. For gatherings, arrange them on a platter with toothpicks for easy snacking.
To store, keep leftover cups in an airtight container in the refrigerator for up to 3 days. They reheat beautifully in a 350°F (175°C) oven for about 10 minutes to regain that crispy exterior. Avoid microwaving if you want to keep the crunch (though it works in a pinch). You can also freeze the baked cups—wrap them individually in plastic wrap and place in a freezer bag for up to 2 months. Thaw overnight in the fridge before reheating in the oven.
Fun fact: the flavors actually deepen if you let the cups sit a few hours or overnight. So if you can resist, they taste even better the next day!
Nutritional Information & Benefits
Each crispy mac and cheese cup contains approximately 220 calories, 12g fat, 18g carbohydrates, and 8g protein, depending on exact ingredients and portions. Using whole milk and real cheese provides calcium and vitamin D, supporting bone health. The pasta offers energy-boosting carbs, while the cheese adds protein and essential fats.
For those watching carbs, try substituting regular pasta with chickpea or lentil pasta for added fiber and protein. Gluten-free adaptations are easy with suitable ingredients. Just be mindful of allergens like dairy and gluten, and swap accordingly.
Personally, I appreciate how this snack feels indulgent but can be made with wholesome ingredients—making it a satisfying treat without the guilt.
Conclusion
If you’re on the hunt for a snack or side that’s both comforting and fun, these Crispy Mac and Cheese Cups with a creamy, cheesy center are absolutely worth your time. They’re easy to make, customizable, and have that perfect crispy-cheesy combo that’ll have everyone asking for seconds. Honestly, I love this recipe because it brings a little nostalgia with a fresh, crispy twist, and it’s become a favorite in my kitchen.
Feel free to tweak the cheeses, add your favorite mix-ins, or make it your own in any way you like. Don’t be shy—let me know how yours turn out! Drop a comment, share your variations, or tag a friend who needs this recipe in their life. You’re going to love these cups, and I’m cheering you on from my kitchen!
Frequently Asked Questions
Can I make these mac and cheese cups ahead of time?
Yes! You can prepare them in advance, refrigerate, and bake just before serving. You can also freeze them baked or unbaked for later use.
What type of cheese works best for the creamy center?
A combo of sharp cheddar and mozzarella gives you the best balance of flavor and meltiness. Adding Parmesan on top adds a nice crisp.
Can I use a different pasta shape?
Absolutely! Small shapes like shells, rotini, or mini penne work well and hold the cheese sauce nicely.
How do I prevent the cups from sticking to the muffin tin?
Grease the muffin tin generously with butter or cooking spray. Let the cups cool a few minutes before removing to help them set.
Are these suitable for kids?
Definitely! They’re kid-friendly snacks that are cheesy and crispy—always a hit with the little ones (and adults too!).
Pin This Recipe!
Crispy Mac and Cheese Cups

A quick and easy recipe for crispy mac and cheese cups with a creamy, cheesy center and a golden crust. Perfect for snacks, potlucks, or family gatherings.
- Prep Time: 15 minutes
- Cook Time: 25 minutes
- Total Time: 40 minutes
- Yield: 12 servings 1x
- Category: Snack
- Cuisine: American
Ingredients
- 2 cups elbow macaroni (about 200g), cooked al dente
- 3 tablespoons unsalted butter, divided
- 3 tablespoons all-purpose flour
- 2 cups whole milk (480ml), warmed
- 2 cups shredded sharp cheddar cheese (about 200g)
- 1 cup shredded mozzarella cheese (about 100g)
- 1/2 cup grated Parmesan cheese (about 50g), for topping
- 1/2 teaspoon garlic powder
- 1/2 teaspoon onion powder
- Salt and black pepper to taste
- 1/2 cup panko breadcrumbs (optional, for extra crunch)
- Cooking spray or additional butter for greasing the muffin tin
Instructions
- Bring a large pot of salted water to a boil. Add 2 cups (200g) elbow macaroni and cook until al dente, about 6-7 minutes. Drain and rinse with cold water to stop cooking. Set aside and lightly toss with 1 tablespoon of butter to prevent sticking.
- In a medium saucepan, melt 2 tablespoons of unsalted butter over medium heat. Whisk in 3 tablespoons of all-purpose flour and cook for 1-2 minutes, stirring constantly until it turns a light golden color (this is your roux).
- Slowly pour in 2 cups (480ml) warmed whole milk, whisking continuously to avoid lumps. Cook until the sauce thickens and coats the back of a spoon, about 4-5 minutes.
- Remove from heat and add 2 cups shredded sharp cheddar, 1 cup shredded mozzarella, garlic powder, onion powder, salt, and pepper. Stir until melted and smooth. Taste and adjust seasoning if needed.
- Fold the cooked pasta into the cheese sauce until well coated.
- Preheat your oven to 375°F (190°C). Grease a 12-cup muffin tin with cooking spray or butter.
- Spoon the mac and cheese mixture into each muffin cup, pressing down slightly with the back of the spoon to compact it. Sprinkle the tops with ½ cup grated Parmesan and, if using, ½ cup panko breadcrumbs for extra crispness.
- Bake for 20-25 minutes, or until the tops are golden brown and crispy.
- Let the cups cool in the tin for 5 minutes before carefully removing with a knife or small spatula. Serve warm.
Notes
If the cheese sauce is too thick, add a splash of milk before mixing with pasta. To prevent sticking, grease the muffin tin well and let cups cool before removing. For gluten-free, use gluten-free pasta, flour, and breadcrumbs. For dairy-free, substitute milk and cheese with dairy-free alternatives.
Nutrition
- Serving Size: 1 mac and cheese cup
- Calories: 220
- Fat: 12
- Carbohydrates: 18
- Protein: 8
Keywords: mac and cheese, crispy mac and cheese cups, cheesy snack, easy mac and cheese, baked mac and cheese, kid-friendly snack