“You really think this is going to work?” my friend asked skeptically, eyeing the little cups lined up on the counter. Honestly, I wasn’t sure either. It had started as a quick fix—midweek, the kind of evening when the oven’s too much effort and all I wanted was something sweet without the fuss. I had stumbled upon this creamy Brazilian no-bake pavê chocolate layered dessert cups recipe tucked away in an old notebook, a scribbled favorite from a colleague’s family gathering. The idea of layering chocolate goodness with creamy textures sounded promising, but I didn’t expect it to turn into the quiet star of our night.
As I spooned the rich, velvety layers into those cups, the scent of cocoa and a hint of vanilla filled the kitchen, making the waiting game for it to set feel like a small eternity. When the first bite happened—soft, smooth, with just the right balance of sweetness and chocolate punch—it was like a little personal celebration. My friend’s skepticism melted away, replaced by a thoughtful, “You’ve got to save me some of these.” That simple line stuck with me, a reminder that sometimes the easiest recipes turn out to be the ones people remember most.
This recipe isn’t about showy techniques or complicated ingredients. It’s the kind of dessert you can pull together when you want something creamy and indulgent but don’t have the energy to fuss with baking. The layers of chocolate and cream are a gentle hug in a cup, perfect for those quiet moments when you deserve a little treat. It’s become my go-to when friends drop by unexpectedly or when I need a sweet reset after a long day.
So, if you ever find yourself doubting a no-bake chocolate pavê, know this: sometimes the simplest ideas bring the most comfort, and these layered dessert cups have quietly claimed a spot in my recipe rotation for good.
Why You’ll Love This Recipe
Having tested this creamy Brazilian no-bake pavê chocolate layered dessert cups recipe several times (sometimes twice in a week, no joke), I’m pretty confident it’s one of those magic desserts that hits all the right notes. Here’s why it’s earned a permanent place in my dessert lineup:
- Quick & Easy: Takes under 30 minutes to prep — perfect for busy weeknights or last-minute dessert cravings.
- Simple Ingredients: Mostly pantry staples like biscuits, cocoa powder, cream, and condensed milk. No hunting for anything exotic.
- Perfect for Gatherings: Whether it’s a casual hangout or a family dinner, these cups impress without stress.
- Crowd-Pleaser: Kids and adults alike keep asking for more — which is always a good sign.
- Unbelievably Delicious: The creamy texture layered with chocolate is a comforting combo that’s honestly hard to resist.
What sets this pavê apart? It’s the balance — the chocolate layer isn’t too bitter or too sweet, and the cream is silky but light, thanks to the whipped cream mixed with sweetened condensed milk. Plus, the use of simple tea biscuits soaked just enough to soften (but not get soggy) offers a lovely contrast of textures. I’ve tried other versions, but this one nails that classic Brazilian flavor and texture perfectly every time.
And if you’re someone who loves desserts with a little nostalgia and soul, this pavê feels like a warm invitation to slow down and savor something sweet without the fuss. It’s like a little Brazilian secret in a cup that brings a smile with every bite.
What Ingredients You Will Need
This recipe uses simple, wholesome ingredients to deliver bold flavor and a satisfying texture without the fuss. Most of these are pantry staples, and substitution options make it flexible for different needs.
- For the Cream Layers:
- Sweetened condensed milk (about 1 cup / 300 ml) — the heart of the creamy sweetness
- Heavy cream or whipping cream (1 cup / 240 ml), chilled — for that fluffy, airy texture
- Vanilla extract (1 teaspoon) — adds a subtle warmth and aroma
- Cream cheese (optional, 100g / 3.5 oz, softened) — for extra richness (I sometimes add this for a tangy twist)
- For the Chocolate Layer:
- Cocoa powder (3 tablespoons) — unsweetened, preferably a good quality such as Hershey’s or Valrhona
- Milk (½ cup / 120 ml) — to dissolve the cocoa and create a smooth chocolate sauce
- Sugar (optional, 1-2 tablespoons) — adjust based on your cocoa powder’s bitterness
- For the Biscuit Layer:
- Tea biscuits or ladyfingers (about 200g / 7 oz) — look for plain, slightly sweet ones like Maizena (a Brazilian favorite) or store-brand alternatives
- Coffee or milk for soaking (1 cup / 240 ml) — coffee adds a nice depth, but milk keeps it kid-friendly
Ingredient Tips: If you want to keep it dairy-free, swap the heavy cream for coconut cream and use a plant-based condensed milk. For a gluten-free option, try gluten-free tea biscuits or crushed gluten-free cookies. In summer, I sometimes add fresh berries between the layers for a fruity surprise.
Equipment Needed
- Mixing Bowls: At least two — one for the cream mixture and one for the chocolate.
- Electric Mixer or Whisk: An electric hand mixer makes whipping cream a breeze, but a sturdy whisk works too if you’re patient.
- Spoon or Small Spatula: For spreading and layering the cream and chocolate smoothly.
- Measuring Cups and Spoons: Accuracy matters here, especially with liquids and cocoa powder.
- Serving Cups or Small Glasses: Individual dessert cups or small bowls (about 6-8 oz / 180-240 ml capacity) to layer the pavê.
- Baking Tray or Plate: To place the cups for easy transfer to the fridge.
For those on a budget, you can use a hand whisk and simple glass jars or reused jam jars as serving vessels. Personally, I’ve found that layering in clear cups really shows off the beautiful chocolate and cream contrast — making it almost too pretty to eat (almost!).
Preparation Method
- Prepare the Cream Mixture (10 minutes): In a large bowl, whip 1 cup (240 ml) of chilled heavy cream with 1 cup (300 ml) of sweetened condensed milk and 1 teaspoon of vanilla extract until soft peaks form. If you’re adding cream cheese for richness, beat it with the condensed milk first for a smooth consistency, then fold in the whipped cream gently. You want it light and airy but still creamy.
- Make the Chocolate Layer (5 minutes): In a small saucepan, whisk together 3 tablespoons of cocoa powder, ½ cup (120 ml) milk, and sugar if using. Heat gently over medium-low heat, stirring constantly until smooth and slightly thickened—about 3-4 minutes. Remove from heat and let it cool to room temperature. It should coat the back of a spoon but not be syrupy.
- Soak the Biscuits (5 minutes): Pour your coffee or milk into a shallow dish. Quickly dip each biscuit for just 1-2 seconds — you want them softened but not falling apart. If you soak them too long, the layers get mushy, which is a common pitfall.
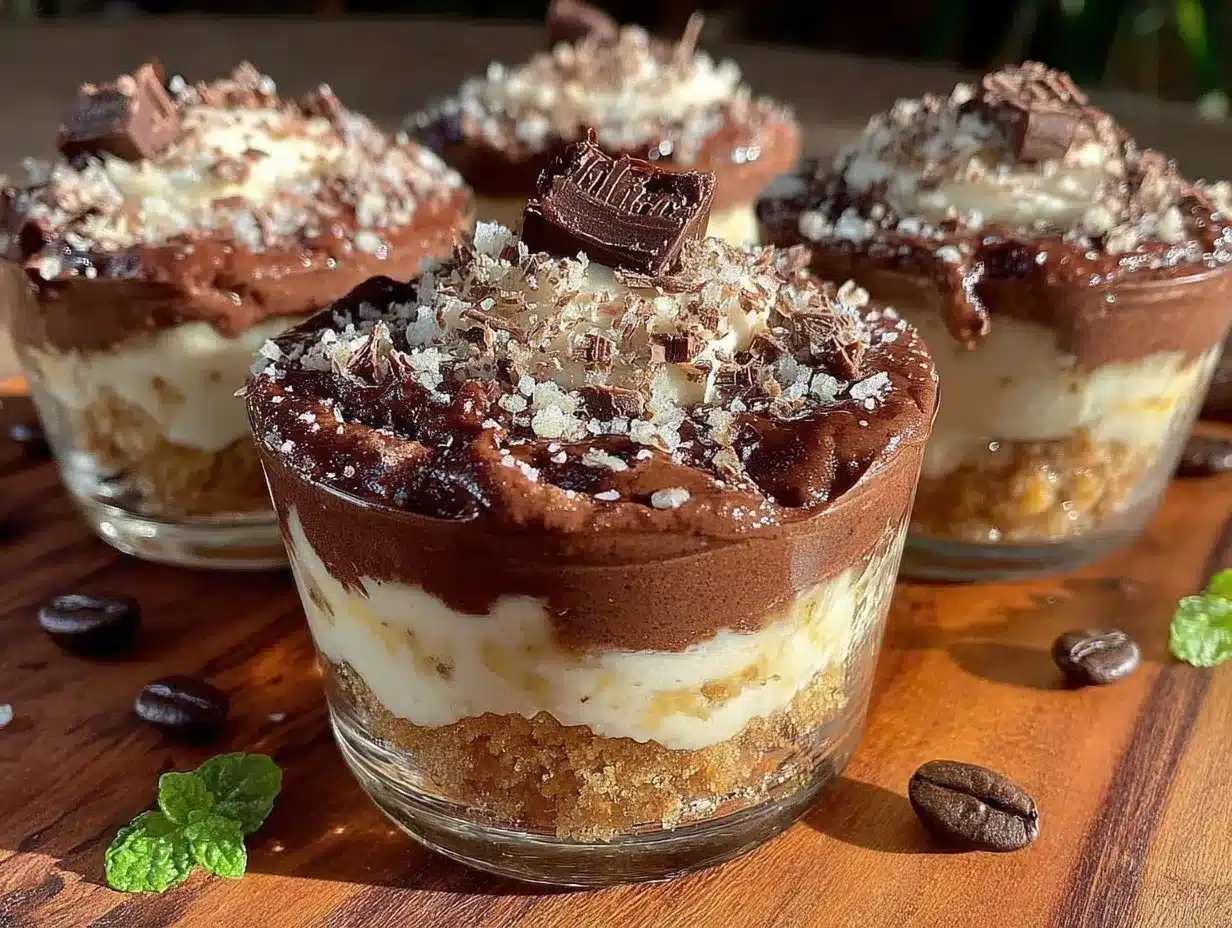
- Layer the Dessert Cups (10 minutes): Start with a layer of soaked biscuits at the bottom of each cup (about 2-3 biscuits, depending on size). Spoon a generous layer of cream mixture over the biscuits, smoothing it out. Follow with a layer of the chocolate sauce. Repeat the layering (biscuits, cream, chocolate) until you fill the cups, finishing with cream on top.
- Chill and Set (At least 4 hours): Cover the cups with plastic wrap and refrigerate for a minimum of 4 hours, ideally overnight. This resting time lets the flavors meld and the texture become perfectly creamy and sliceable with a spoon.
- Serve: Before serving, you can dust the tops with a little cocoa powder or garnish with chocolate shavings or fresh berries for an extra touch.
Pro Tip: If you find the cream mixture too loose, a tablespoon of powdered gelatin dissolved in warm water can be folded in for extra stability without changing the flavor. Just let the mixture cool a bit before adding.
Cooking Tips & Techniques
Whipping cream to the right consistency is key here. Over-whip and you risk turning it grainy or into butter, under-whip and the cream won’t hold the layers properly. I’ve learned it’s better to stop when you see soft peaks that gently hold shape but still feel smooth.
Another tip is soaking the biscuits briefly—too much soaking makes the base mushy, and too little leaves them hard. Think of it like a quick bath, not a soak-and-swim. For a coffee-soaked version, strong brewed espresso adds a lovely depth, but milk keeps it mellow and kid-friendly.
Layering evenly helps the dessert look polished and ensures every bite has that perfect balance of cream, chocolate, and biscuit. I usually use a small spoon or offset spatula for neat edges.
Lastly, patience is a virtue here. The dessert tastes best after chilling, so resist the urge to dig in right away. The resting time lets the flavors marry and the texture settle into that luscious pavê consistency.
Variations & Adaptations
- Nutty Twist: Add a layer of finely chopped toasted nuts like hazelnuts or almonds between the cream and chocolate layers. It adds a nice crunch and flavor contrast.
- Fruit Infusion: Incorporate fresh strawberries or raspberries between layers for a bright, tart surprise that pairs beautifully with the chocolate.
- Vegan Version: Use coconut cream whipped with a bit of maple syrup, vegan condensed milk alternatives, and gluten-free vegan biscuits. The texture changes a bit but remains indulgent.
- Mocha Pavê: Mix instant coffee powder into the chocolate layer for a mocha-flavored dessert with a kick.
- Spicy Chocolate: Stir a pinch of cinnamon or chili powder into the chocolate sauce for a subtle warmth that’s unexpectedly delightful.
One of my favorite personal tweaks is adding a splash of orange liqueur (or orange zest for kids) to the cream layer—it gives a fresh zing that cuts through the richness beautifully.
Serving & Storage Suggestions
Serve these dessert cups chilled straight from the fridge for the best creamy texture and flavor. They look great presented in clear glasses, so the layers show off — perfect for impressing guests without any fancy plating.
Pair the pavê with a simple espresso or a rich, creamy coffee to complement the chocolate and cream. For a celebratory touch, a glass of sparkling wine or a fruit-forward red wine works wonders too.
Store leftover dessert cups covered in the fridge for up to 3 days. The flavors actually deepen and meld over time, making leftovers even better on day two. Avoid freezing as the texture changes and cream can become grainy after thawing.
When reheating is necessary (say, if they’ve been out too long), let them sit at room temperature for 15-20 minutes rather than microwaving, to keep that luscious cream texture intact.
Nutritional Information & Benefits
This creamy Brazilian no-bake pavê chocolate layered dessert cups recipe is indulgent but surprisingly straightforward in nutrition. Per serving (one 6 oz cup), you can expect roughly:
| Calories | 320-350 kcal |
|---|---|
| Fat | 18-22g (mostly from cream and chocolate) |
| Carbohydrates | 35-40g (from biscuits and condensed milk) |
| Protein | 5-6g (mainly from dairy) |
Key ingredients like cocoa powder bring antioxidants, and the dairy offers calcium and vitamin D. While it’s rich, the portion size helps keep it reasonable as an occasional treat. For those watching carbs, swapping biscuits for low-carb alternatives and using sugar-free cocoa powder can make this dessert more diet-friendly.
Personally, I appreciate that this recipe balances indulgence with simple, familiar ingredients, making it feel like a real treat instead of an over-processed dessert.
Conclusion
This creamy Brazilian no-bake pavê chocolate layered dessert cups recipe has quietly become a favorite for good reasons. It’s approachable, satisfying, and the kind of dessert that feels like a little celebration in a cup without needing a lot of time or fancy equipment.
Whether you tweak it with nuts, fruit, or a splash of liqueur, it adapts beautifully to your taste and occasion. I love that it’s both comforting and elegant in its simplicity—no stress, just delicious layers of chocolate and cream.
If you try it, I’d love to hear how it turns out for you or what twists you add. There’s something special about sharing these little culinary experiments that make cooking feel like a community.
After all, dessert is more than just food—it’s a moment, a memory, a bit of joy you can scoop up anytime.
FAQs About Creamy Brazilian No-Bake Pavê Chocolate Layered Dessert Cups
How long should I soak the biscuits for the pavê?
Just 1-2 seconds in coffee or milk is enough. You want them soft but not soggy, or the dessert will lose its texture.
Can I make pavê ahead of time?
Yes! It actually tastes better after chilling overnight, as the flavors meld and the layers set perfectly.
What if I don’t have sweetened condensed milk?
You can make a quick substitute by simmering regular milk with sugar until it thickens, but using store-bought condensed milk keeps it authentic and simple.
Is there a non-dairy version of this dessert?
Yes, use coconut cream whipped with maple syrup and dairy-free condensed milk alternatives. Just pick vegan-friendly biscuits to keep it fully plant-based.
Can I use other types of cookies instead of tea biscuits?
Absolutely. Ladyfingers, graham crackers, or even butter cookies work well. Just adjust soaking time as different cookies absorb liquids differently.
For a cozy dinner pairing, I remember serving this after a creamy meal like the creamy cheesy taco pasta, and it was the perfect sweet finish. Or if you’re craving something savory before dessert, the crispy sheet pan Italian sausage and peppers balances richness with robust flavors that set the stage nicely.
Pin This Recipe!
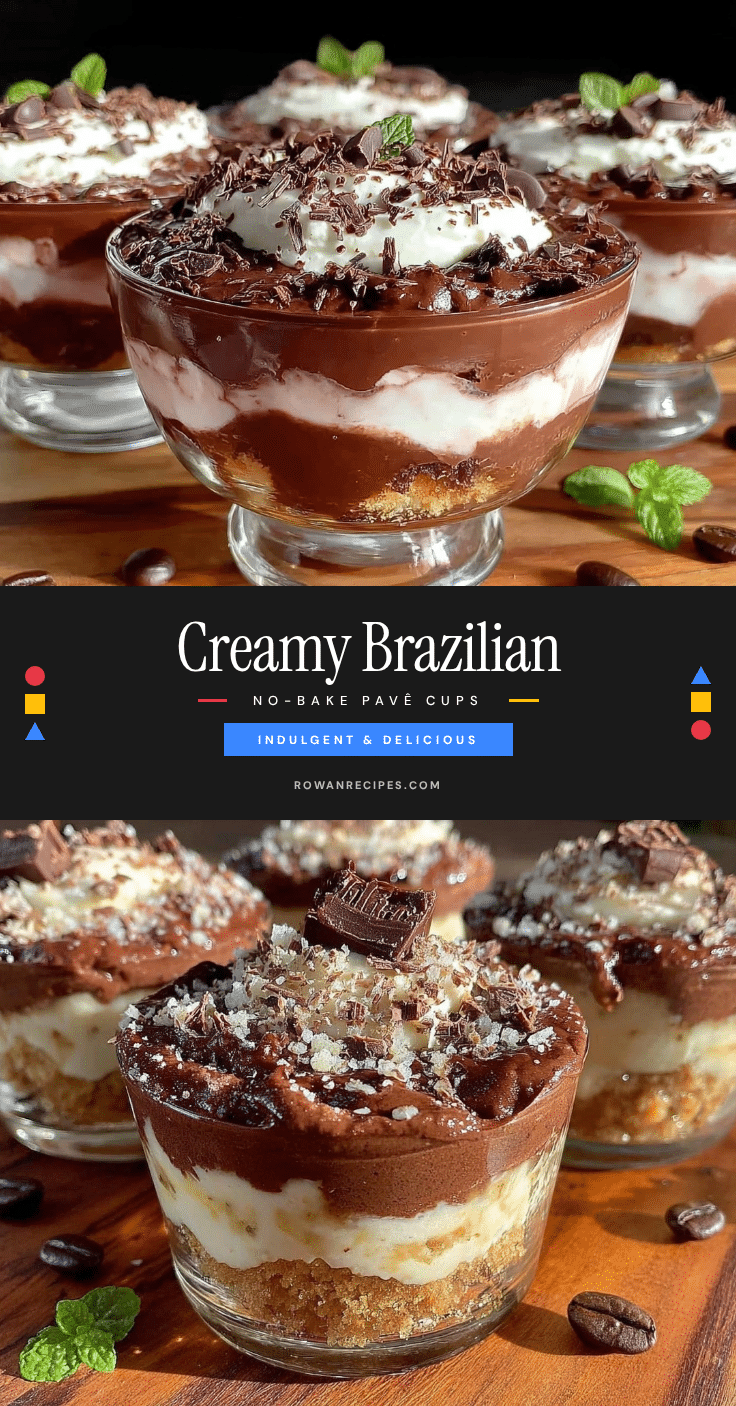
Creamy Brazilian No-Bake Pavê Recipe Easy Layered Chocolate Dessert Cups

A quick and easy no-bake Brazilian pavê dessert featuring creamy layers of whipped cream and sweetened condensed milk, layered with chocolate sauce and soaked tea biscuits for a comforting and indulgent treat.
- Prep Time: 20 minutes
- Cook Time: 5 minutes
- Total Time: 4 hours 25 minutes
- Yield: 6 servings 1x
- Category: Dessert
- Cuisine: Brazilian
Ingredients
- 1 cup (300 ml) sweetened condensed milk
- 1 cup (240 ml) heavy cream or whipping cream, chilled
- 1 teaspoon vanilla extract
- 100g (3.5 oz) cream cheese, softened (optional)
- 3 tablespoons unsweetened cocoa powder
- ½ cup (120 ml) milk
- 1–2 tablespoons sugar (optional)
- 200g (7 oz) tea biscuits or ladyfingers
- 1 cup (240 ml) coffee or milk for soaking
Instructions
- Prepare the Cream Mixture: In a large bowl, whip 1 cup (240 ml) of chilled heavy cream with 1 cup (300 ml) of sweetened condensed milk and 1 teaspoon of vanilla extract until soft peaks form. If using cream cheese, beat it with the condensed milk first for a smooth consistency, then fold in the whipped cream gently.
- Make the Chocolate Layer: In a small saucepan, whisk together 3 tablespoons of cocoa powder, ½ cup (120 ml) milk, and sugar if using. Heat gently over medium-low heat, stirring constantly until smooth and slightly thickened (about 3-4 minutes). Remove from heat and let cool to room temperature.
- Soak the Biscuits: Pour coffee or milk into a shallow dish. Quickly dip each biscuit for 1-2 seconds to soften without becoming soggy.
- Layer the Dessert Cups: Start with a layer of soaked biscuits at the bottom of each cup (about 2-3 biscuits). Spoon a generous layer of cream mixture over the biscuits, smoothing it out. Follow with a layer of chocolate sauce. Repeat layers until cups are filled, finishing with cream on top.
- Chill and Set: Cover the cups with plastic wrap and refrigerate for at least 4 hours, ideally overnight, to let flavors meld and texture set.
- Serve: Optionally dust tops with cocoa powder or garnish with chocolate shavings or fresh berries before serving.
Notes
Whip cream to soft peaks to avoid graininess. Soak biscuits briefly (1-2 seconds) to prevent mushiness. Chill at least 4 hours or overnight for best texture. Optional: add powdered gelatin for stability or garnish with cocoa powder, chocolate shavings, or fresh berries. Dairy-free and gluten-free substitutions available.
Nutrition
- Serving Size: One 6 oz cup
- Calories: 335
- Sugar: 28
- Sodium: 150
- Fat: 20
- Saturated Fat: 12
- Carbohydrates: 38
- Fiber: 2
- Protein: 6
Keywords: no-bake dessert, pavê, Brazilian dessert, chocolate dessert, layered dessert, easy dessert, creamy dessert, chocolate cups