I burned the first batch of dill pickles I ever tried to make—twice—before I understood what was going wrong. Honestly, I wasn’t even sure I liked pickles enough to go through the trouble. The first attempts ended up more like limp cucumber mush swimming in salty water, totally missing that crisp snap I secretly craved. I used to think homemade pickles were complicated and time-consuming, but that couldn’t be further from the truth with this easy quick refrigerator dill pickles recipe. It’s funny how sometimes the simplest recipes teach you the most about patience and paying attention to little details, like the right salt or the perfect amount of dill.
One evening, while rummaging through the fridge, I realized I had a pile of cucumbers that were on their last leg, and I didn’t want to waste them. So I grabbed a few staples—vinegar, garlic, dill—and threw together what would become my favorite quick pickle recipe. The smell of fresh dill and garlic mingling with vinegar filled the kitchen, and I felt a quiet sort of satisfaction watching those cucumbers soak up flavor in the fridge overnight. The next day, biting into a crisp, tangy pickle that I made myself was a small but genuine victory.
This recipe stuck with me because it’s honest food—no fuss, no fancy ingredients, just that satisfying crunch and bright homemade flavor you don’t get from store-bought jars. It’s the kind of thing I keep on hand when I want something fresh, tangy, and a little bit addictive to snack on or jazz up sandwiches. What’s nice is that you don’t have to fuss with canning or boiling for hours. It’s a quick fridge pickle that respects both your time and your taste buds.
So yeah, homemade pickles turned from a kitchen fail into one of my favorite quick projects. And I’m pretty sure once you try these easy quick refrigerator dill pickles, you’ll understand why I keep coming back to this simple, crisp, and flavorful recipe—no matter how many times I almost mess it up.
Why You’ll Love This Recipe
This easy quick refrigerator dill pickles recipe is a game-changer if you’ve ever been intimidated by pickling at home. I’ve tested this one over and over (and yes, sometimes burnt a batch or two) so you don’t have to. Here’s why it’s such a keeper:
- Quick & Easy: Ready to eat in just 24 hours, no canning needed—perfect for those last-minute pickle cravings.
- Simple Ingredients: Uses everyday pantry staples like vinegar, garlic, and dill. No fancy or hard-to-find spices here.
- Perfect for Any Occasion: Whether it’s a snack, sandwich topper, or a crunchy side for your next sheet pan honey mustard chicken, these pickles bring the zing.
- Crowd-Pleaser: Kids and adults alike tend to reach for these crisp pickles first when they’re out at parties or family dinners.
- Unbelievably Delicious: The balance of tangy vinegar, fresh dill, and just the right amount of garlic makes these pickles stand out from the typical jarred kind.
What makes this recipe different? It’s all about the technique—no boiling water baths or complicated spice blends. The pickling brine is straightforward but perfectly balanced to keep your cucumbers crunchy and full of fresh flavor. Plus, I like to use fresh dill heads and a pinch of mustard seeds to add a subtle depth. Honestly, the texture alone makes these quick refrigerator dill pickles a go-to; they’re that satisfying snap you crave but rarely get from store-bought jars.
This recipe isn’t just about making pickles; it’s about making something you can trust to taste homemade—bright, fresh, and crisp every time. It’s also a reminder that sometimes the best food projects are the ones that don’t require hours in the kitchen or fancy equipment. Just some good cucumbers, a few herbs, and patience for the flavors to come alive in your fridge.
What Ingredients You Will Need
For this easy quick refrigerator dill pickles recipe, the ingredients are straightforward and mostly pantry staples that are easy to find and swap if needed. Each component plays a key role in creating that classic dill pickle flavor and crispy texture.
- Fresh Cucumbers – About 4-5 medium pickling cucumbers (Kirby cucumbers are ideal for their firmness and size). If Kirbys aren’t available, any firm, small to medium cucumber will work. Avoid large slicing cucumbers as they tend to be watery.
- Fresh Dill – 3-4 sprigs or a few dill heads if you can find them; they add that unmistakable fresh herb aroma. If fresh isn’t an option, dried dill can be used but won’t be quite as vibrant.
- Garlic – 2-3 cloves, peeled and smashed. Garlic adds a punchy, savory depth that balances the tanginess.
- White Vinegar – 1 cup (240 ml). Use distilled white vinegar for a clean, sharp acidity. Apple cider vinegar can be substituted for a slightly fruitier taste.
- Water – 1 cup (240 ml), preferably filtered or spring water for the best flavor.
- Pickling Salt – 1 tablespoon (use kosher or pickling salt, avoid iodized salt which can cloud the brine and affect flavor).
- Granulated Sugar – 1 teaspoon, optional but helps balance the acidity and rounds out the flavor.
- Mustard Seeds – 1 teaspoon, adds a subtle spicy warmth (optional but recommended).
- Black Peppercorns – 1 teaspoon whole peppercorns for a gentle peppery bite.
- Red Pepper Flakes – A pinch for a little heat, optional depending on your spice preference.
- Bay Leaf – 1 leaf, optional for a subtle earthy undertone.
For best results, I recommend using fresh, firm cucumbers and fresh dill when possible. I usually grab my herbs from the local farmer’s market or even grow them on my windowsill during summer. For salt, I trust Diamond Crystal kosher salt for consistent results, but Morton’s works fine too. When I want a little twist, I swap out the sugar for a touch of honey for a naturally sweet note. If you’re looking for a gluten-free or keto-friendly snack, these pickles fit perfectly.
Equipment Needed
- Quart-sized Mason Jar or any Glass Jar with Lid: You want something airtight that fits about 4-5 cucumbers and brine comfortably. I’ve found that wide-mouth jars make packing and unpacking easier.
- Measuring Cups and Spoons: Precise measurements are important for balancing acidity and saltiness.
- Small Saucepan: To warm the brine ingredients so salt and sugar dissolve fully.
- Cutting Board and Sharp Knife: For slicing cucumbers and prepping garlic.
- Tongs or Fork: To press down the cucumbers in the jar if needed.
If you don’t have a wide-mouth jar, a clean glass container or even a food-safe plastic container with a lid works fine. Just be sure it seals well to keep flavors fresh. I’ve used simple recycled pickle jars with success when I was just testing this recipe for fun. For maintenance, glass jars are best washed thoroughly with hot soapy water or run through the dishwasher before use to avoid any lingering odors or bacteria.
Preparation Method
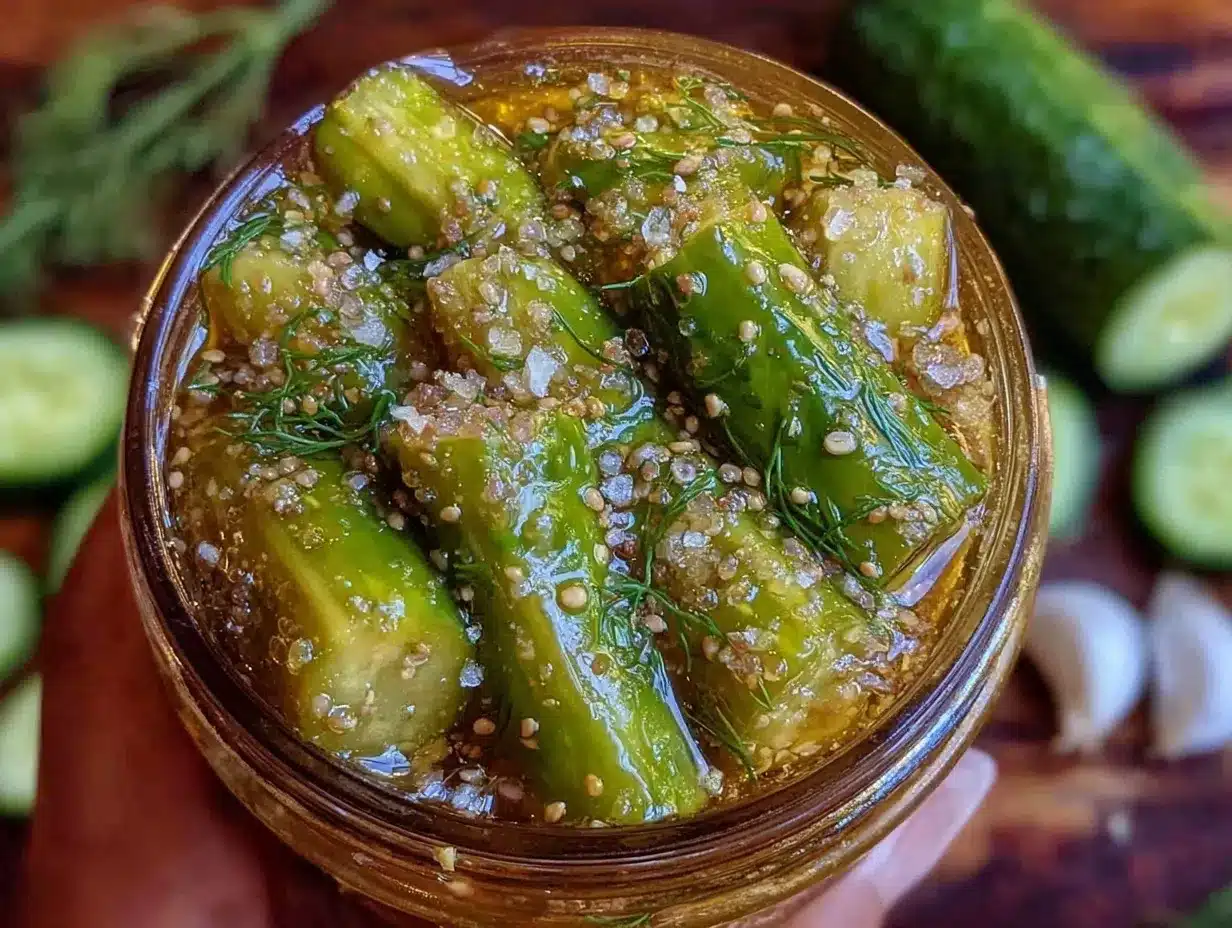
- Wash and Slice the Cucumbers: Rinse 4-5 medium pickling cucumbers thoroughly under cold water. Slice off the blossom end (this helps keep pickles crisp), then cut the cucumbers into spears or thin rounds depending on your preference. About 4-5 spears or ¼-inch thick rounds per cucumber works well. Dry them with a clean towel to prevent excess water diluting the brine.
- Prepare the Brine: In a small saucepan, combine 1 cup (240 ml) white vinegar, 1 cup (240 ml) water, 1 tablespoon pickling salt, and 1 teaspoon granulated sugar. Heat over medium heat, stirring occasionally, until the salt and sugar dissolve completely. Remove from heat and let cool slightly to warm (not boiling hot) before pouring.
- Pack the Jar: Place the smashed garlic cloves, fresh dill sprigs, mustard seeds, peppercorns, red pepper flakes (if using), and bay leaf into the bottom of your clean quart-sized glass jar. Pack the sliced cucumbers in tightly but without crushing them, leaving about ½ inch of headspace at the top.
- Pour the Brine: Carefully pour the warm brine over the cucumbers, making sure they’re fully submerged. Tap the jar gently on the counter to release any trapped air bubbles. If needed, use a clean utensil to press the cucumbers down to keep them under the brine.
- Seal and Refrigerate: Screw the lid on tightly and place the jar in the refrigerator. Let the pickles sit for at least 24 hours before tasting, though they improve even more after 48 hours. The longer you wait, the more the flavors develop, but don’t worry—they won’t get mushy if you follow the recipe.
- Enjoy! Use these crisp refrigerator dill pickles as a snack, sandwich addition, or crunchy side. Once opened, keep refrigerated and consume within 3-4 weeks for best freshness.
If you notice your pickles aren’t as crisp as you’d like, try slicing them a bit thicker next time or ensuring you remove the blossom end (it contains enzymes that soften cucumbers). Also, make sure the salt is fully dissolved in the brine before pouring and that the cucumbers are fully submerged. These little details make all the difference. When I first started, I sometimes rushed the cooling of the brine, which led to soft pickles. Now, I just let the brine cool to warm before pouring and haven’t had a soggy pickle since.
Cooking Tips & Techniques
Getting those easy quick refrigerator dill pickles perfectly crisp and flavorful is about knowing a few kitchen tricks I picked up after trial and error. Here are some tips to keep in mind:
- Use Pickling or Kosher Salt: Avoid table salt with iodine, which can cloud the brine and affect taste.
- Slice Thickness Matters: Thinner slices absorb flavor faster but can get soft quicker. Spear cuts tend to stay crunchier longer.
- Don’t Skip the Blossom End Removal: That tiny cucumber tip contains enzymes that break down firmness.
- Keep Cucumbers Submerged: Use a small weight or clean utensil if needed to keep cucumbers fully under brine to avoid spoilage.
- Brine Temperature: Pour warm (not hot) brine over cucumbers. Too hot can cook them slightly and soften texture.
- Patience is Key: Let pickles marinate in the fridge for at least 24 hours before tasting, though 48 is better for flavor depth.
- Use Fresh Dill: I’ve learned that fresh dill heads (flowering tops) pack more aroma than just the fronds. If you can’t find them, fresh fronds are still great.
- Experiment with Spices: Mustard seeds, peppercorns, and red pepper flakes add layers of flavor; don’t be afraid to tweak.
One mistake I made early on was pouring boiling brine onto the cucumbers—resulting in mushy pickles. I now always let the brine cool a bit first. Another lesson was realizing that the size of the jar matters; too small and the cucumbers get too tightly packed and bruise, too large and the brine is too diluted. Quart jars hit the sweet spot for this recipe.
Variations & Adaptations
While this recipe is classic and straightforward, I often play around with small tweaks depending on what I have on hand or my mood. Here are a few variations you might like to try:
- Garlic Dill Pickle Chips: Slice cucumbers thinly into rounds for perfect pickle chips. Great for sandwiches or snacking.
- Spicy Refrigerator Pickles: Add extra red pepper flakes or a sliced jalapeño pepper for a spicy kick that wakes up your palate.
- Low-Sodium Option: Cut the salt by half and add a splash of lemon juice for acidity. Keep in mind pickling salt balances flavor and texture, so expect a milder taste.
- Herb Variations: Swap dill for fresh tarragon or fresh oregano for a different herbaceous note.
- Quick Bread and Butter Style: Add 2 tablespoons sugar and a splash of apple cider vinegar plus some sliced onions for a sweeter, tangier pickle.
For those who want to try canning, you can convert this recipe with a hot water bath, but be aware that the texture will differ from fridge pickles. Personally, I stick to refrigerator pickles because they’re so fast and reliable. I once tried a batch using a slow cooker method and ended up with soggy pickles—lesson learned to keep it simple and cold.
Serving & Storage Suggestions
These easy quick refrigerator dill pickles are best served cold and straight from the fridge. The crisp snap is part of the joy, and letting them warm up to room temperature dulls that satisfying crunch.
They’re fantastic as a crunchy side to rich meals like the tender slow cooker French dip sandwiches, or alongside creamy dishes such as a cheesy taco pasta. You can also chop them up for a tangy addition to potato salad or add them to a charcuterie board for a bright contrast.
Keep your pickles stored in the refrigerator, tightly sealed. They stay fresh for up to 3-4 weeks, but honestly, they rarely last that long around here. When reheating leftovers that include pickles (say, in a sandwich or warm dish), I usually add the pickles fresh at serving time to maintain the crisp texture.
Over time, the flavors deepen and meld together, making the pickles taste even better after a few days. Just remember to give the jar a gentle shake every couple of days to redistribute the brine and spices.
Nutritional Information & Benefits
These refrigerator dill pickles are low in calories, with about 5-10 calories per spear, making them a guilt-free snack or condiment. They’re naturally gluten-free, low-carb, and vegan-friendly. The cucumbers provide hydration and a small amount of fiber, while the vinegar may support digestion.
The fresh dill and garlic offer antioxidants and trace nutrients, adding a healthy boost. Because this recipe uses no preservatives or artificial ingredients, it’s a fresher, cleaner alternative to store-bought pickles, which often contain added sugars and preservatives. Just watch the sodium content if you’re monitoring salt intake.
From my own view, these pickles are a great way to add flavor and crunch without extra calories or additives, making them a smart choice for anyone looking to snack mindfully without sacrificing taste.
Conclusion
This easy quick refrigerator dill pickles recipe is one I keep returning to because it’s simple, reliable, and honestly, quite addictive. It takes just a few ingredients and a little bit of patience to transform ordinary cucumbers into crisp, tangy pickles that feel homemade and fresh. Whether you’re a pickle enthusiast or just looking for a quick way to add crunch and flavor to your meals, this recipe will serve you well.
Feel free to customize it to your taste—more garlic, more spice, or a hint of sweetness—and make it your own. I love that it’s accessible and doesn’t require special equipment or hours in the kitchen, yet delivers that satisfying crunch and punch of flavor every time. If you ever find yourself enjoying a batch with a sandwich or alongside a comforting dinner, you’ll know exactly why this recipe sticks with me.
And hey, if you try pairing these pickles with a hearty sheet pan Italian sausage and peppers, you’re in for a real treat. Feel free to share your own twists or questions in the comments—I’m always curious how others make these quick refrigerator dill pickles their own.
Frequently Asked Questions
How long do refrigerator dill pickles last?
Stored properly in the fridge, these pickles stay fresh for 3-4 weeks. They usually taste best within the first two weeks when the crunch is at its peak.
Can I use regular cucumbers instead of pickling cucumbers?
You can, but pickling cucumbers like Kirby cucumbers are firmer and produce crisper pickles. Regular slicing cucumbers have more water and may yield softer pickles.
Do I have to boil the brine for refrigerator pickles?
Not necessarily. In this recipe, the brine is warmed just enough to dissolve salt and sugar, then cooled slightly before pouring. Boiling can soften cucumbers too much.
Can I make these pickles spicy?
Absolutely! Add red pepper flakes, sliced jalapeños, or a pinch of cayenne pepper to the jar before refrigerating for a spicy kick.
What’s the best way to keep my pickles crunchy?
Remove the blossom end of cucumbers, use pickling salt, keep cucumbers fully submerged in brine, and store them cold in the fridge. Also, slicing thicker and keeping the brine cool when pouring helps maintain crunch.
Pin This Recipe!
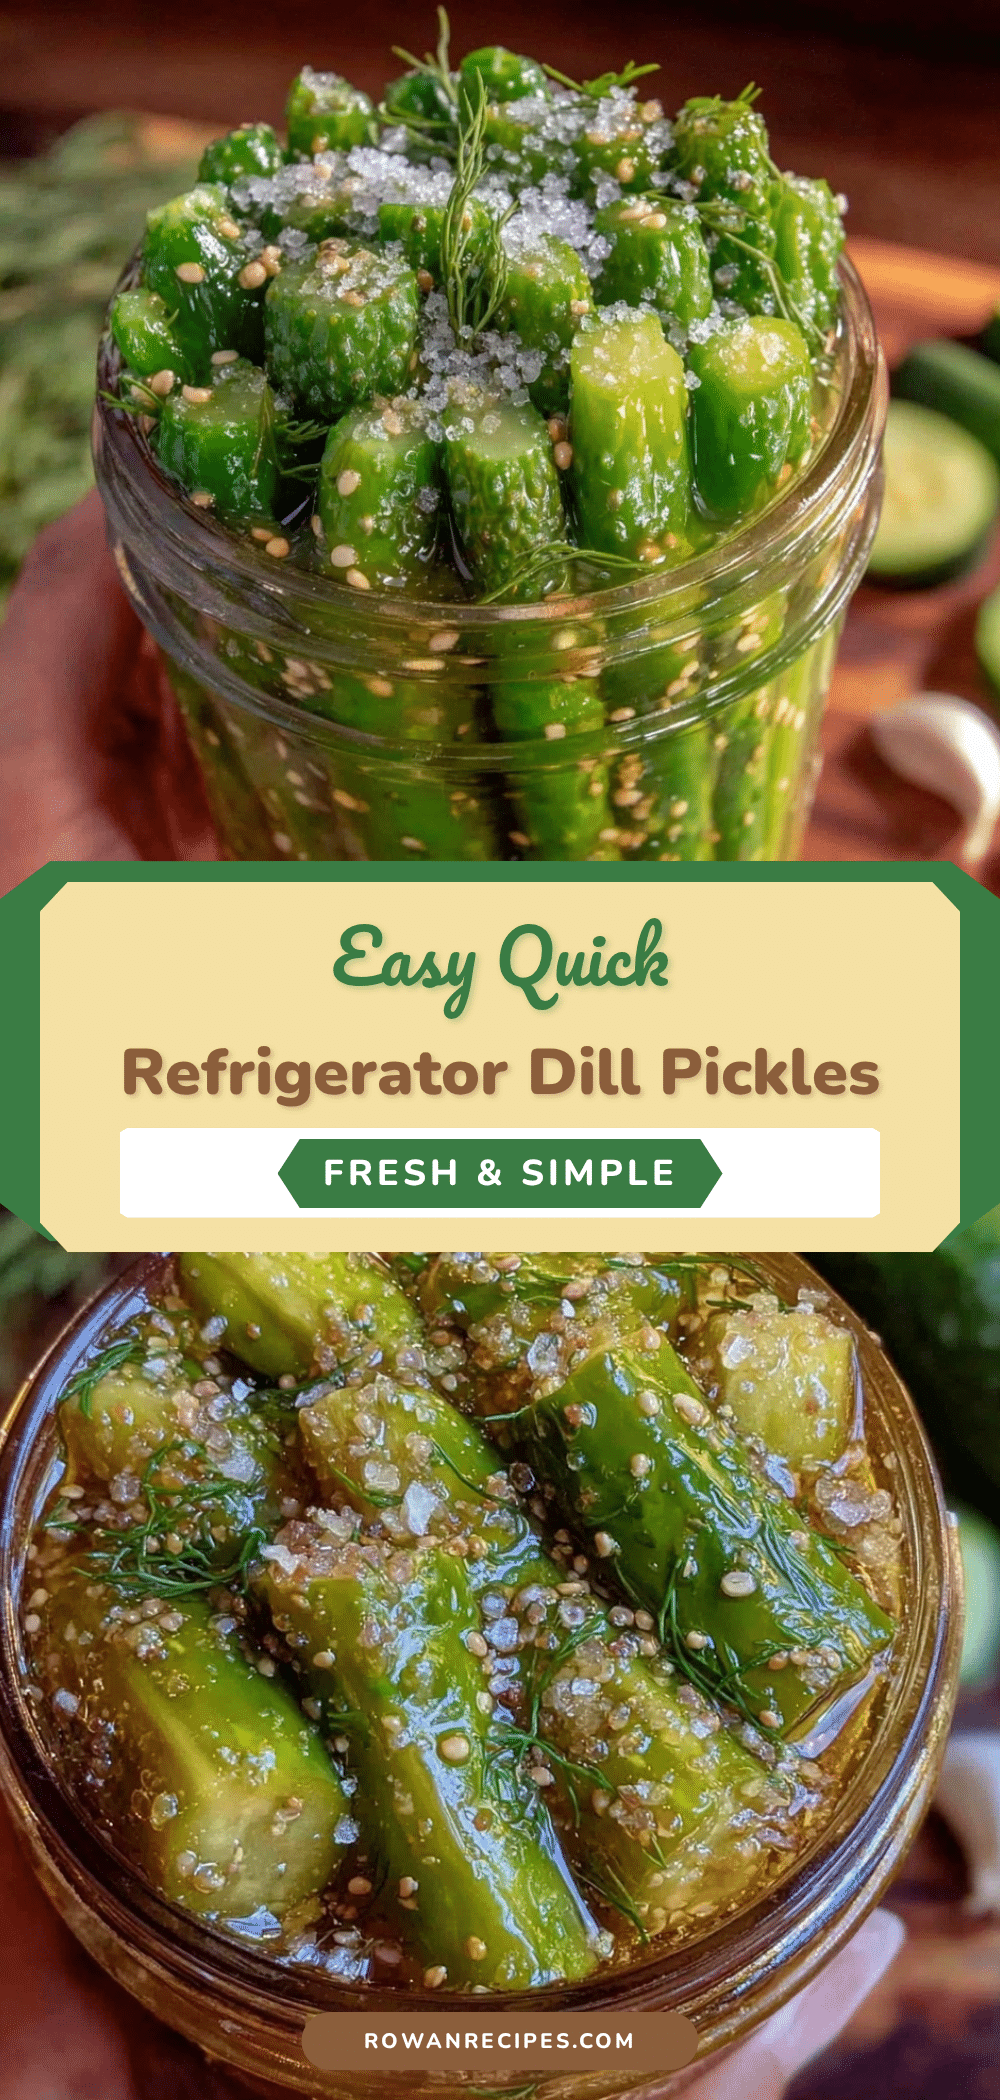
Easy Quick Refrigerator Dill Pickles Recipe for Perfect Crisp Flavor
A simple and quick refrigerator dill pickles recipe that delivers crisp, tangy pickles without the fuss of canning or boiling. Perfect for snacking, sandwiches, or as a crunchy side.
- Prep Time: 15 minutes
- Cook Time: 5 minutes
- Total Time: 24 hours 20 minutes
- Yield: 4-5 servings 1x
- Category: Condiment / Snack
- Cuisine: American
Ingredients
- 4–5 medium pickling cucumbers (Kirby cucumbers preferred)
- 3–4 sprigs fresh dill or a few dill heads
- 2–3 cloves garlic, peeled and smashed
- 1 cup (240 ml) white vinegar (distilled preferred)
- 1 cup (240 ml) water (filtered or spring water preferred)
- 1 tablespoon pickling salt (kosher or pickling salt, avoid iodized)
- 1 teaspoon granulated sugar (optional)
- 1 teaspoon mustard seeds (optional but recommended)
- 1 teaspoon whole black peppercorns
- Pinch of red pepper flakes (optional)
- 1 bay leaf (optional)
Instructions
- Wash and slice the cucumbers: Rinse cucumbers under cold water, slice off the blossom end, then cut into spears or 1/4-inch thick rounds. Dry with a clean towel.
- Prepare the brine: In a small saucepan, combine vinegar, water, pickling salt, and sugar. Heat over medium heat, stirring until salt and sugar dissolve. Remove from heat and let cool slightly to warm.
- Pack the jar: Place smashed garlic, fresh dill, mustard seeds, peppercorns, red pepper flakes (if using), and bay leaf into the bottom of a clean quart-sized glass jar. Pack sliced cucumbers tightly without crushing, leaving 1/2 inch headspace.
- Pour the brine: Pour warm brine over cucumbers, fully submerging them. Tap jar to release air bubbles and press cucumbers down if needed.
- Seal and refrigerate: Screw lid on tightly and refrigerate for at least 24 hours before tasting. Flavors improve after 48 hours.
- Enjoy: Use as a snack, sandwich addition, or crunchy side. Keep refrigerated and consume within 3-4 weeks.
Notes
Remove the blossom end of cucumbers to keep pickles crisp. Use pickling or kosher salt, avoid iodized salt. Pour warm (not boiling) brine to prevent softening. Keep cucumbers fully submerged in brine. Let pickles marinate at least 24 hours, preferably 48 hours for best flavor. Store refrigerated and consume within 3-4 weeks.
Nutrition
- Serving Size: About 1 spear or 2-3
- Calories: 510
- Sugar: 0.5
- Sodium: 30040
- Carbohydrates: 12
- Fiber: 0.3
- Protein: 0.2
Keywords: dill pickles, refrigerator pickles, quick pickles, easy pickles, homemade pickles, crisp pickles, dill, garlic, pickling