“Could you pass me the paratha, please?” That’s what I heard from my roommate mid-morning when I accidentally left a batch of these golden beauties on the stove a bit longer than usual. Honestly, I was just trying to whip up something quick and filling before heading out, not expecting anything fancy. But that crisp edge, the soft, spiced potato filling inside, paired with the cool yogurt dip — it caught everyone off guard.
At first, I wasn’t sold on making aloo paratha myself. The idea of rolling dough and stuffing it sounded like a lot more work than my usual grab-and-go breakfasts. But after that first accidental crispy batch, I found myself making them every few days. It’s funny how a simple dish like this, which I initially thought was too complicated, turned into my go-to comfort food. The slight crackle when you bite in, the gentle warmth of the potato filling, and the refreshing yogurt dip make it feel like a little celebration even on the busiest mornings.
What really stuck with me was how approachable this recipe is for beginners. No fancy gadgets, no elaborate steps—just basic ingredients you probably have in your pantry. And the best part? It’s forgiving. You’re not going to ruin it if the dough’s a bit thicker or if the filling spills out a little. That ease combined with the crispy, flavorful result is what makes this easy crispy aloo paratha recipe so special to me. Plus, the cooling yogurt dip adds that touch of simplicity and balance that’s just perfect.
It’s the kind of recipe that makes you realize you don’t have to be a pro to enjoy homemade Indian flatbreads. If you’ve ever hesitated because it seemed tricky, this is the one to try. It’s humble, satisfying, and honestly, a little bit addictive once you get the hang of it.
Why You’ll Love This Recipe
After making this easy crispy aloo paratha with yogurt dip several times, I can say it’s one of those recipes that wins over skeptics and beginners alike. From personal experience and countless kitchen trials, here’s why this recipe stands out:
- Quick & Easy: Ready in under 30 minutes, it’s perfect for busy mornings or when you want a comforting snack without the fuss.
- Simple Ingredients: No need for special trips to ethnic stores; this recipe uses pantry staples like potatoes, wheat flour, and basic spices.
- Perfect for Breakfast or Light Dinner: Whether it’s a lazy weekend brunch or a quick bite after work, these parathas fit the bill.
- Crowd-Pleaser: Everyone from kids to adults loves the crispy outside and soft, flavorful filling inside.
- Unbelievably Delicious: The perfect balance of crispy edges and soft, spiced potatoes makes each bite memorable.
What sets this apart from other aloo paratha recipes is the way the filling is seasoned just right—not too spicy, but full of flavor with cumin and coriander. Plus, the crispy finish comes from a little extra ghee or oil on the pan, which gives it that irresistible crunch. I’ve tried versions that skip the yogurt dip, but honestly, it’s the cooling effect that rounds out the flavors beautifully. This isn’t just any beginner aloo paratha recipe; it’s the one I trust when I want a reliable, tasty result every time.
And truly, there’s something comforting about the simplicity here. It’s a recipe that feels like a warm hug on a plate, with a little twist of crispiness to keep things interesting. Whether you want to impress guests with a homemade Indian dish or just treat yourself, this recipe is a solid pick.
What Ingredients You Will Need
This easy crispy aloo paratha recipe uses simple, wholesome ingredients to deliver bold flavor and satisfying texture without the fuss. Most of these are everyday pantry staples, but a few tips on choosing the best will help make your paratha shine.
- For the Dough:
- Whole wheat flour (atta) – 2 cups (250 g), preferably fresh for pliable dough
- Water – about ¾ cup (180 ml), adjust as needed for soft dough
- Salt – ½ teaspoon (adds balance)
- Oil or ghee – 1 tablespoon (for kneading and to help with crispiness)
- For the Potato Filling:
- Potatoes – 3 medium (about 450 g), boiled and mashed
- Green chilies – 1 small, finely chopped (optional for mild heat)
- Fresh coriander leaves – 2 tablespoons, chopped (adds freshness)
- Ground cumin – 1 teaspoon
- Amchur (dry mango powder) – ½ teaspoon (optional, for tanginess)
- Salt – to taste
- Black pepper – ¼ teaspoon
- Garam masala – ¼ teaspoon (optional for warmth)
- For Cooking & Serving:
- Ghee or oil – 2-3 tablespoons (to fry and get that crispy crust)
- Plain yogurt – 1 cup (240 ml), for the dip
- Fresh mint or chopped herbs – 1 tablespoon, mixed into the yogurt for extra zing (optional)
For the flour, I recommend using a good quality atta like Pillsbury or Annapurna if you can find it. It gives the right texture when kneaded. If you want a gluten-free version, swapping the wheat flour with chickpea flour or a gluten-free blend is possible, though the texture will differ.
Boiled potatoes should be fluffy and dry, not watery, to avoid soggy filling. I usually boil them whole with skin on, then peel and mash for a nice consistency. When it comes to spices, feel free to adjust green chilies and garam masala based on your heat preference.
Equipment Needed
- Mixing bowls – one large for dough, one for filling
- Rolling pin – a small to medium-sized rolling pin works best for beginners
- Flat griddle or non-stick skillet (tawa) – essential for cooking the parathas evenly
- Spatula or flat turner – for flipping the parathas gently
- Potato masher or fork – to mash the boiled potatoes smoothly
- Measuring cups and spoons – for accuracy in ingredients
If you don’t have a traditional tawa, a heavy-bottomed frying pan or cast-iron skillet works just fine. I’ve also used a non-stick pan when I was in a hurry, and the parathas crisped up nicely without sticking. For rolling, if you’re new to it, a silicone rolling mat can help keep things tidy, but a clean countertop dusted with flour does the trick.
Keep your rolling pin and skillet well-seasoned or non-stick for the best results, and don’t hesitate to use a little extra ghee or oil to prevent sticking and boost crispiness.
Preparation Method

- Prepare the Dough: In a large bowl, combine 2 cups (250 g) of whole wheat flour with ½ teaspoon salt. Add 1 tablespoon oil or ghee. Slowly pour in about ¾ cup (180 ml) of water, mixing with your hand or a spoon until the dough comes together. Knead for about 8-10 minutes until smooth and elastic. Cover the dough with a damp cloth and let it rest for 20 minutes. Resting relaxes the gluten, making rolling easier.
- Make the Potato Filling: While the dough rests, peel and mash 3 medium boiled potatoes until smooth with a fork or masher. Add finely chopped green chili (if using), 2 tablespoons chopped coriander, 1 teaspoon ground cumin, ½ teaspoon amchur (optional), ¼ teaspoon black pepper, ¼ teaspoon garam masala (optional), and salt to taste. Mix thoroughly. The filling should be well-seasoned but not wet—if it feels too moist, add a pinch of dry flour to bind it.
- Divide Dough and Filling: Divide the dough into 6 equal balls, roughly 60 g each. Similarly, divide the potato filling into 6 portions. Keep both covered to prevent drying.
- Roll and Stuff: Take one dough ball and roll it into a small circle about 4 inches (10 cm) in diameter using light dusting of flour. Place one portion of potato filling in the center. Bring the edges together like a pouch and pinch to seal tightly. Flatten the stuffed ball gently, then carefully roll it out into a 7-8 inch (18-20 cm) circle. Don’t press too hard to avoid the filling spilling out.
- Cook the Paratha: Heat your tawa or skillet over medium-high heat. Place the rolled paratha on the hot pan. Cook for about 30 seconds until you see bubbles forming, then flip. Brush or drizzle a little ghee or oil around the edges and on the surface. Flip again after 30 seconds and apply ghee/oil on the other side. Cook until both sides are golden brown and crispy, about 2-3 minutes per side. Use a spatula to press gently for even cooking.
- Prepare Yogurt Dip: While cooking the last few parathas, mix 1 cup (240 ml) plain yogurt with a pinch of salt and 1 tablespoon chopped fresh mint or herbs if you like. This will add a refreshing contrast to the crispy paratha.
- Serve Immediately: Serve hot with the yogurt dip on the side for dipping or spreading.
Tip: If the filling leaks a bit during rolling or cooking, don’t worry—it adds a rustic charm. Just make sure your pan isn’t too hot, or you risk burning the outside before the inside cooks through.
Cooking Tips & Techniques
One of the trickiest parts is rolling the stuffed dough without tearing. I learned that dusting your surface and rolling pin lightly with flour prevents sticking without drying out the dough. Also, using a rested dough makes it more pliable, so don’t skip that step.
When frying, medium heat is your friend. Too high, and the paratha crisps too fast on the outside but stays doughy inside. Too low, and it becomes greasy. A steady medium flame lets the potatoes warm through while getting that signature golden crust.
Don’t rush flipping. Let the paratha cook enough on one side before turning, or it might stick or break. Also, brushing ghee or oil in small amounts while cooking lends that irresistible crispness. Using ghee adds a buttery, slightly nutty flavor that really makes the difference.
Practice makes perfect here—if your first paratha isn’t perfectly round or has a hole, it’s okay! I remember my early attempts were lopsided and had filling poking out, but they still tasted delicious. Over time, your hands get used to the pressure and rolling speed.
Finally, multitasking helps. While one paratha cooks, you can roll the next one to keep the rhythm going. This way, the whole batch comes together quickly and warm.
Variations & Adaptations
This easy crispy aloo paratha recipe is flexible and welcomes a few tasty twists:
- Stuffing Variations: Swap the potato filling for other veggies like mashed sweet potatoes, paneer (Indian cheese) with spices, or even grated radish (mooli) for a peppery bite.
- Spice Level: Adjust green chilies or add a pinch of red chili powder for a spicier version. For milder taste, omit chilies and add a little sweet paprika instead.
- Gluten-Free Option: Use chickpea flour or a gluten-free flour blend for the dough. The texture will change, but the flavors remain delightful.
- Cooking Method: Try baking the parathas on a hot cast-iron griddle or even air frying for a lower-oil alternative. Though frying in ghee gives the best crispy texture, these methods work well too.
- Herb-Infused Yogurt Dip: Mix the yogurt dip with finely chopped cilantro, roasted cumin powder, or a squeeze of lemon for fresh variations.
Once, I tried adding grated cheese inside the potato filling (shh, don’t tell traditionalists!). The gooey surprise was a hit with my friends and made the paratha even more indulgent. If you’re curious, it’s definitely worth a shot!
Serving & Storage Suggestions
These crispy aloo parathas are best served hot off the pan, paired with the cool yogurt dip. The contrast in temperature and texture is what makes the experience so satisfying. You can also add a side of pickle or chutney for a tangy punch.
For a heartier meal, serve with a simple cucumber salad or a bowl of dal (lentils) for dipping. If you like a fusion twist, these parathas pair surprisingly well with dishes like honey mustard chicken or a light vegetable stir-fry.
To store leftovers, wrap the parathas tightly in foil or airtight containers and refrigerate for up to 2 days. Reheat on a hot skillet with a little ghee to refresh the crispiness. Avoid microwaving if you want to keep them crispy—microwaving tends to make them soft and chewy.
If you want to freeze them, stack parchment paper between each paratha and freeze in a sealed bag. Thaw overnight in the fridge and reheat on the pan as usual. The flavors tend to mellow overnight, making them even tastier the next day.
Nutritional Information & Benefits
Each serving of this easy crispy aloo paratha with yogurt dip has roughly 250-300 calories, depending on the amount of ghee used. It provides a good balance of carbohydrates from the whole wheat flour and potatoes, along with protein and probiotics from the yogurt dip.
The whole wheat flour adds fiber and essential nutrients, making it more filling than refined flour options. Potatoes provide vitamin C, potassium, and resistant starch, which supports digestion. The yogurt dip offers calcium and beneficial bacteria that aid gut health.
This recipe is naturally vegetarian and can be adapted to gluten-free or vegan diets with simple swaps. If you have allergies, be mindful of dairy in the yogurt dip but you can easily swap it for coconut or almond-based yogurt alternatives.
From a personal wellness perspective, I find this recipe to be a comforting yet balanced meal option. It’s satisfying without feeling heavy, and the fresh herbs in the yogurt add a nice nutritional boost.
Conclusion
Easy crispy aloo paratha with yogurt dip is more than just a beginner-friendly recipe—it’s a little slice of comfort that’s approachable and rewarding. Whether you’re new to Indian cooking or just looking for a straightforward way to make homemade parathas, this recipe hits all the right notes.
Feel free to tweak the spices, fillings, and dips to suit your taste. I’ve found that small adjustments like adding fresh herbs or swapping fillings can make the recipe feel fresh every time. Honestly, that’s why I keep coming back to it.
If you give this recipe a try, I’d love to hear how your parathas turned out or what variations you experimented with. Sharing these kitchen wins makes the whole experience even sweeter. Just remember, it’s all about enjoying the process and savoring those crispy, flavorful bites.
Frequently Asked Questions
How can I prevent the aloo filling from leaking out?
Make sure to seal the dough edges well when stuffing and roll gently without pressing too hard. Using a rested, pliable dough helps keep it intact during cooking.
Can I make the dough ahead of time?
Absolutely. You can prepare the dough a few hours in advance and keep it covered at room temperature, or refrigerate overnight for even better texture.
What do I do if my paratha turns out soggy?
This usually happens if the filling is too wet or the pan is not hot enough. Try adding a pinch of dry flour to the filling and cook on medium heat to get a crispy crust.
Is there a vegan alternative for the yogurt dip?
Yes, you can substitute regular yogurt with dairy-free coconut or almond yogurt. Add fresh herbs and a pinch of salt for flavor.
Can I freeze cooked aloo parathas?
Yes, freeze them with parchment paper between each to prevent sticking. Reheat on a skillet for best results, avoiding the microwave for crispiness.
Pin This Recipe!
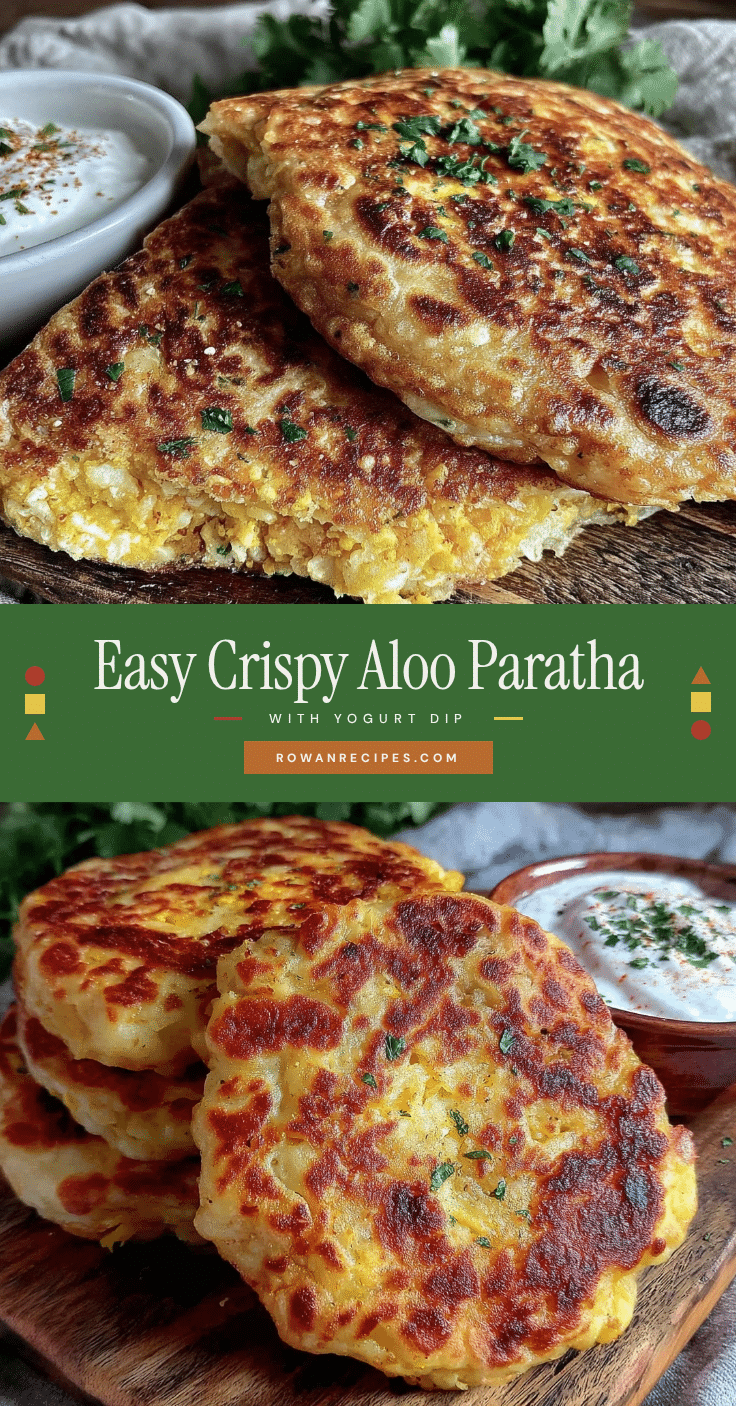
Easy Crispy Aloo Paratha Recipe for Beginners with Yogurt Dip

A beginner-friendly recipe for crispy aloo paratha with a soft, spiced potato filling, paired with a cooling yogurt dip. Quick, easy, and perfect for breakfast or a light dinner.
- Prep Time: 10 minutes
- Cook Time: 20 minutes
- Total Time: 30 minutes
- Yield: 6 servings 1x
- Category: Main Course
- Cuisine: Indian
Ingredients
- 2 cups (250 g) whole wheat flour (atta), preferably fresh
- About 3/4 cup (180 ml) water, adjust as needed for soft dough
- 1/2 teaspoon salt
- 1 tablespoon oil or ghee (for kneading and crispiness)
- 3 medium potatoes (about 450 g), boiled and mashed
- 1 small green chili, finely chopped (optional)
- 2 tablespoons fresh coriander leaves, chopped
- 1 teaspoon ground cumin
- 1/2 teaspoon amchur (dry mango powder) (optional)
- Salt to taste
- 1/4 teaspoon black pepper
- 1/4 teaspoon garam masala (optional)
- 2–3 tablespoons ghee or oil (to fry and get crispy crust)
- 1 cup (240 ml) plain yogurt (for the dip)
- 1 tablespoon fresh mint or chopped herbs (optional, mixed into yogurt)
Instructions
- Prepare the Dough: In a large bowl, combine 2 cups whole wheat flour with 1/2 teaspoon salt. Add 1 tablespoon oil or ghee. Slowly pour in about 3/4 cup water, mixing until dough forms. Knead for 8-10 minutes until smooth and elastic. Cover with a damp cloth and let rest for 20 minutes.
- Make the Potato Filling: Peel and mash 3 medium boiled potatoes until smooth. Add finely chopped green chili (if using), 2 tablespoons chopped coriander, 1 teaspoon ground cumin, 1/2 teaspoon amchur (optional), 1/4 teaspoon black pepper, 1/4 teaspoon garam masala (optional), and salt to taste. Mix well. If too moist, add a pinch of dry flour to bind.
- Divide Dough and Filling: Divide dough into 6 equal balls (~60 g each). Divide potato filling into 6 portions. Keep covered to prevent drying.
- Roll and Stuff: Roll one dough ball into a 4-inch circle using light flour dusting. Place one portion of filling in center. Bring edges together and pinch to seal tightly. Flatten gently, then roll out into a 7-8 inch circle carefully without pressing too hard.
- Cook the Paratha: Heat tawa or skillet over medium-high heat. Place rolled paratha on pan. Cook about 30 seconds until bubbles form, then flip. Brush or drizzle ghee/oil on edges and surface. Flip again after 30 seconds and apply ghee/oil on other side. Cook until golden brown and crispy, about 2-3 minutes per side. Press gently with spatula for even cooking.
- Prepare Yogurt Dip: Mix 1 cup plain yogurt with a pinch of salt and 1 tablespoon chopped fresh mint or herbs if desired.
- Serve Immediately: Serve hot with yogurt dip on the side.
Notes
Use medium heat to avoid burning outside while ensuring inside cooks through. Rest dough for pliability. Dust rolling surface lightly with flour to prevent sticking. If filling leaks, it’s fine and adds rustic charm. Use ghee for buttery flavor and crispiness. For gluten-free, substitute wheat flour with chickpea or gluten-free blend. Yogurt dip can be replaced with dairy-free alternatives for vegan option.
Nutrition
- Serving Size: 1 stuffed paratha wi
- Calories: 275
- Sugar: 3
- Sodium: 300
- Fat: 10
- Saturated Fat: 4
- Carbohydrates: 38
- Fiber: 5
- Protein: 6
Keywords: aloo paratha, crispy paratha, potato stuffed flatbread, Indian breakfast, yogurt dip, beginner recipe, easy paratha