Introduction
“You’ve got to try this cheesecake,” my coworker insisted, sliding a small, wax-paper-wrapped square across the desk during a particularly chaotic afternoon. Honestly, I was skeptical—no-bake Basque cheesecake? With a burnt caramel top? It sounded like a wild mashup that might just flop. But one bite later, I was hooked. The creamy softness melted in my mouth, and that slightly bitter caramelized crust? Perfection. I couldn’t believe something this indulgent was so effortlessly whipped up without firing up the oven.
That little treat sparked my obsession. I found myself making this recipe multiple times a week, refining the balance between the sweet cream cheese and the smoky caramel top. It’s that kind of dessert that feels fancy but is shockingly easy, especially when you’re juggling a million things. And honestly, it’s become my go-to when I want to impress friends but don’t want to spend hours baking or cleaning up.
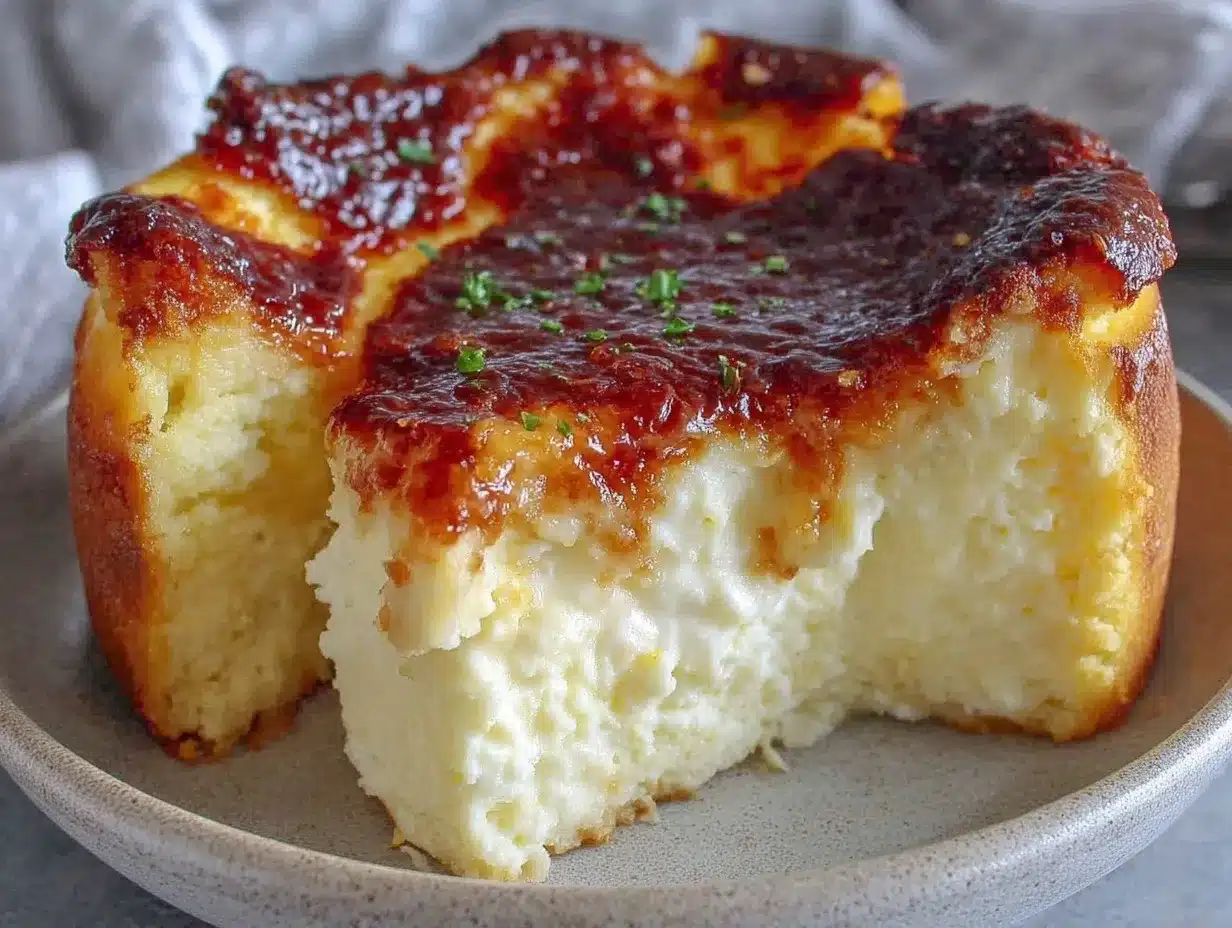
The magic of this creamy no-bake Japanese Basque cheesecake with burnt caramel top is in its simplicity and that unforgettable texture. It’s like the softest cloud with a caramelized kiss, perfect for late-night cravings or lazy weekends. I’ll share all the secrets I’ve learned along the way so you can get that perfect slice every time.
Why You’ll Love This Recipe
After countless tries and tweaks, this recipe stands out as a trustworthy favorite. Here’s why it deserves a spot in your dessert arsenal:
- Quick & Easy: Ready in under 30 minutes without any baking fuss. Ideal for those busy weeknights when you want dessert, like, yesterday.
- Simple Ingredients: No need for exotic items—most are pantry staples or easy to find at your local store.
- Perfect for Special Occasions: Whether it’s a casual get-together, a birthday, or a quiet coffee break, this cheesecake elevates the moment.
- Crowd-Pleaser: The silky texture and bittersweet caramel top get rave reviews from both kids and adults alike.
- Unbelievably Delicious: The contrast between the creamy filling and the slightly burnt caramel layer is pure magic—comfort food with a bit of edge.
What sets this apart from other cheesecakes? The no-bake method keeps it wonderfully creamy and luscious without drying out or cracking like its baked cousins. Plus, the burnt caramel top adds a subtle smoky sweetness that you just don’t get with typical cheesecakes. It’s a texture and flavor play that’s honestly addictive.
It’s the kind of recipe that makes you pause and savor each bite, perfect for those moments when you want to treat yourself without overcomplicating things.
What Ingredients You Will Need
This recipe uses simple, wholesome ingredients to deliver bold flavor and satisfying texture without the fuss. Most of these you probably have on hand, and substitutions are easy if needed.
- Cream Cheese, 16 oz (450 g), softened – The heart of the cheesecake. I prefer Philadelphia for the smoothest texture.
- Heavy Cream, 1 cup (240 ml) – Adds richness and creaminess, use full-fat for best results.
- Granulated Sugar, ¾ cup (150 g) – For sweetness and caramelizing the top.
- Gelatin Powder, 1 tablespoon (about 10 g) – Helps the cheesecake set without baking. Use powdered gelatin like Knox.
- Water, 3 tablespoons (45 ml) – To bloom the gelatin.
- Vanilla Extract, 1 teaspoon – For subtle warmth and depth.
- Salt, a pinch – Balances the sweetness perfectly.
- Butter, 1 tablespoon (14 g), melted – Adds silkiness to the batter.
- Cornstarch, 1 teaspoon (optional) – Helps stabilize for a smoother texture but can be skipped.
Ingredient notes: If you want a lighter version, swap heavy cream with full-fat coconut milk. For a vegetarian option, agar agar can replace gelatin but requires different preparation. In summer, fresh berries on top add a lovely, fresh contrast to the burnt caramel.
Equipment Needed
- Springform Pan (7-8 inch / 18-20 cm diameter) – Essential for easy removal without messing up the delicate cheesecake. If you don’t own one, a cake pan lined with parchment works.
- Mixing Bowls – Multiple sizes for cream cheese, cream, and gelatin prep.
- Electric Mixer or Hand Whisk – For smooth, lump-free batter. A stand mixer makes things easier but a hand mixer works fine.
- Small Saucepan – To melt gelatin and caramelize sugar for the burnt top.
- Rubber Spatula – Great for scraping down the bowl and folding ingredients gently.
- Thermometer (optional) – Helpful if you want to nail the caramelization temperature around 350°F (175°C).
Tip: I once tried making this cheesecake in a regular cake pan without a removable bottom, and it nearly ended in disaster. Splurging on a simple springform pan made cleanup and presentation so much easier. For caramelizing sugar, a heavy-bottomed pan prevents hotspots and burning.
Preparation Method
- Bloom the Gelatin: Pour 3 tablespoons (45 ml) cold water into a small bowl and sprinkle 1 tablespoon (10 g) powdered gelatin evenly over the surface. Let it sit for 5-7 minutes until the gelatin absorbs the water and becomes spongy.
- Prepare Cream Cheese: In a large mixing bowl, beat 16 oz (450 g) softened cream cheese until smooth and creamy, about 2-3 minutes. This step is crucial to avoid lumps in the final cheesecake.
- Heat Gelatin: Gently warm the bloomed gelatin in a small saucepan over low heat until fully dissolved, about 1-2 minutes. Avoid boiling or overheating, or it will lose its setting power. Set aside to cool slightly.
- Make the Burnt Caramel Top: In a separate heavy-bottom pan, heat ¾ cup (150 g) granulated sugar over medium heat without stirring. Swirl the pan gently to melt the sugar evenly. Watch closely as it turns a deep amber color—this is your burnt caramel. Quickly pour half of it into the bottom of the lined springform pan to create a thin caramel layer. Be careful, it’s hot! Let it cool and harden.
- Add Sugar and Butter to Cream Cheese: Slowly add the remaining granulated sugar and 1 tablespoon melted butter to the cream cheese, mixing until fully incorporated.
- Fold in Vanilla and Salt: Add 1 teaspoon vanilla extract and a pinch of salt, mixing briefly.
- Whip the Heavy Cream: In a separate bowl, whip 1 cup (240 ml) heavy cream to soft peaks. Gently fold the whipped cream into the cream cheese mixture using a spatula, preserving the airy texture.
- Incorporate Gelatin: Slowly drizzle the dissolved gelatin into the cheesecake batter while folding continuously. This ensures the gelatin is evenly distributed for a smooth set.
- Pour Batter into Pan: Pour the cheesecake batter over the hardened caramel layer in the springform pan. Smooth the surface with a spatula.
- Caramelize the Top: Quickly pour the reserved burnt caramel over the top of the cheesecake batter. Use a spoon to spread it evenly; it will harden and form that signature burnt caramel crust.
- Chill: Cover loosely with plastic wrap and refrigerate for at least 6 hours, preferably overnight, until fully set and creamy.
- Serve: Run a thin knife along the edges before releasing the springform to ensure clean slices. Serve chilled for that perfect creamy texture and crunchy caramel top.
Pro tip: If you notice sugar crystals starting to form while caramelizing, brush the sides of the pan with a wet pastry brush to prevent graininess. The caramel top should smell nutty and slightly smoky when ready, not burnt or acrid.
Cooking Tips & Techniques
Getting the burnt caramel top just right can feel intimidating, but a few tricks make it manageable every time. Use a heavy-bottomed pan to avoid hot spots that burn the sugar prematurely. Patience is key—don’t rush or stir the sugar; gentle swirling helps it melt evenly.
When mixing cream cheese, always use room temperature to prevent lumps. If lumps appear, a quick zap in the microwave for 10 seconds and then whisking helps smooth things out.
Folding whipped cream into the batter should be done gently to keep the airy texture intact; overmixing will deflate the mixture and make it dense.
Setting the gelatin properly is crucial. If you overheat or boil it, the cheesecake won’t firm up nicely. I learned this the hard way after a few failed attempts.
For efficiency, bloom the gelatin while preparing the cream cheese, so you save time. Multitasking helps, especially if you’re making this alongside other dishes like the creamy cheesy taco pasta recipe that’s a lifesaver on busy nights.
Variations & Adaptations
This cheesecake is wonderfully versatile. Here are some ways to make it your own:
- Fruit Swirl: Add a berry compote swirl into the batter before chilling for a fresh fruity twist.
- Matcha Version: Mix 1 tablespoon of matcha powder into the cream cheese for a subtle earthy flavor and a beautiful green hue.
- Vegan Adaptation: Substitute cream cheese with vegan cream cheese and use agar agar instead of gelatin. Coconut cream replaces heavy cream for richness.
- Chocolate-Caramel: Melt some dark chocolate into the batter for a decadent chocolate-caramel combo.
- Nutty Crunch: Sprinkle toasted almonds or hazelnuts on top of the caramel layer before chilling for an added texture element.
One time, I tried adding a hint of yuzu zest for a citrus kick—it was surprisingly refreshing and paired beautifully with the burnt caramel.
Serving & Storage Suggestions
Serve this cheesecake chilled to enjoy the creamy texture and crisp caramel top at its best. It pairs beautifully with a cup of strong black coffee or a light green tea, especially if you’ve tried the matcha twist.
For presentation, a few fresh berries or a dollop of whipped cream add an elegant touch without overpowering the flavors.
Store leftovers covered in the fridge for up to 4 days. The cheesecake firms up a bit more but remains creamy and delicious. Avoid freezing as the texture can suffer, but if you must, thaw slowly in the refrigerator overnight.
Reheating isn’t recommended since it’s a no-bake cheesecake, but letting it sit at room temperature for 10-15 minutes before serving softens it slightly and brings out the flavors.
Interestingly, the burnt caramel flavor intensifies a bit after a day, making leftovers even more indulgent if you can wait that long!
Nutritional Information & Benefits
Each serving (about 1/8 of cheesecake) contains approximately:
| Calories | 320 kcal |
|---|---|
| Fat | 28 g |
| Protein | 6 g |
| Carbohydrates | 12 g |
| Sugar | 10 g |
The recipe provides a good source of calcium and protein thanks to the cream cheese and heavy cream. While it’s a treat, using real ingredients like full-fat dairy ensures richness without artificial additives.
For those watching carbs, it’s moderately low compared to traditional cheesecakes loaded with crust and sugar. The no-bake method helps keep the texture smooth without extra flour or starch.
Note: Contains dairy and gelatin, so it’s not suitable for vegans or those with gelatin allergies unless adapted as suggested.
Conclusion
This creamy no-bake Japanese Basque cheesecake with burnt caramel top has become one of my favorite quick desserts—always impressing without the stress. It’s deceptively simple and delivers that perfect balance of silky texture and smoky sweetness you might not expect from a no-bake treat.
Feel free to tweak the flavors to your liking—maybe a hint of citrus, a sprinkle of nuts, or a swirl of fruit. I love how adaptable it is, making it a reliable go-to whenever I want something special without hours in the kitchen.
Give it a try and let me know how your cheesecake turns out. I’m always curious about your variations and stories, so drop a comment below or share your photos. Here’s to effortless desserts that feel like a little luxury every day!
Frequently Asked Questions
Can I use a different type of gelatin for this cheesecake?
Yes, powdered gelatin works best, but sheet gelatin can be used if you adjust the quantity and bloom it properly. For vegetarian options, agar agar is possible but requires a different preparation method.
Why does the caramel top sometimes harden unevenly?
Uneven caramelization usually happens if the sugar isn’t melted evenly or the pan is too hot in spots. Swirling gently and using a heavy-bottom pan helps prevent this issue.
Can I make this cheesecake ahead of time?
Absolutely! It actually tastes better after chilling overnight as the flavors meld and the texture firms up perfectly.
What’s the best way to remove the cheesecake from the pan?
Run a thin, warm knife around the edges before releasing the springform. This helps prevent sticking and keeps the sides clean.
Can I substitute the heavy cream with something lighter?
You can try using full-fat coconut milk for a dairy-free twist or light cream for lower fat, but this may slightly affect the texture and richness.
For those who enjoy creamy, comforting dishes, you might also appreciate the creamy cheesy taco pasta or the luscious creamy garlic butter Tuscan shrimp pasta. Both are great for those nights when you crave rich, satisfying flavors without too much fuss.
Pin This Recipe!
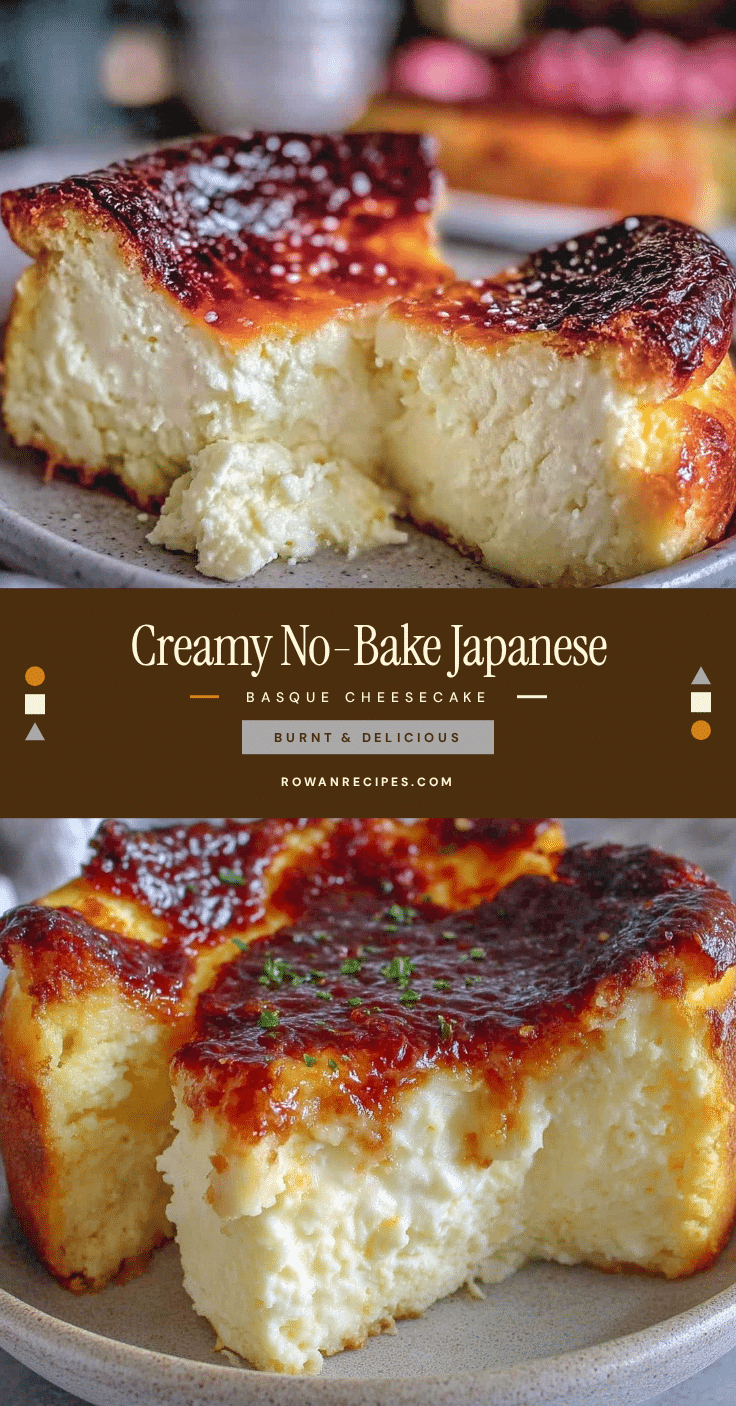
Creamy No-Bake Japanese Basque Cheesecake Recipe with Burnt Caramel Top Easy and Perfect
A creamy, no-bake Japanese Basque cheesecake featuring a luscious burnt caramel top. This easy recipe delivers a silky texture and smoky sweetness without the need for baking.
- Prep Time: 15 minutes
- Cook Time: 10 minutes
- Total Time: 6 hours 25 minutes
- Yield: 8 servings 1x
- Category: Dessert
- Cuisine: Japanese
Ingredients
- 16 oz (450 g) cream cheese, softened
- 1 cup (240 ml) heavy cream, full-fat
- 3/4 cup (150 g) granulated sugar
- 1 tablespoon (about 10 g) gelatin powder
- 3 tablespoons (45 ml) water
- 1 teaspoon vanilla extract
- Pinch of salt
- 1 tablespoon (14 g) butter, melted
- 1 teaspoon cornstarch (optional)
Instructions
- Pour 3 tablespoons cold water into a small bowl and sprinkle 1 tablespoon powdered gelatin evenly over the surface. Let sit for 5-7 minutes until spongy.
- In a large mixing bowl, beat 16 oz softened cream cheese until smooth and creamy, about 2-3 minutes.
- Gently warm the bloomed gelatin in a small saucepan over low heat until fully dissolved, about 1-2 minutes. Avoid boiling. Set aside to cool slightly.
- In a heavy-bottom pan, heat 3/4 cup granulated sugar over medium heat without stirring. Swirl gently until sugar melts and turns deep amber. Quickly pour half into the bottom of a lined 7-8 inch springform pan to create a thin caramel layer. Let cool and harden.
- Slowly add the remaining granulated sugar and 1 tablespoon melted butter to the cream cheese, mixing until incorporated.
- Add 1 teaspoon vanilla extract and a pinch of salt, mixing briefly.
- Whip 1 cup heavy cream to soft peaks in a separate bowl. Gently fold whipped cream into the cream cheese mixture.
- Slowly drizzle dissolved gelatin into the batter while folding continuously.
- Pour cheesecake batter over the hardened caramel layer in the springform pan and smooth the surface.
- Quickly pour reserved burnt caramel over the top of the batter and spread evenly. It will harden to form the burnt caramel crust.
- Cover loosely with plastic wrap and refrigerate for at least 6 hours or overnight until fully set and creamy.
- Run a thin knife along edges before releasing springform pan. Serve chilled.
Notes
Use room temperature cream cheese to avoid lumps. Bloom gelatin properly without boiling to ensure setting. Use a heavy-bottomed pan for even caramelization. For a vegetarian option, agar agar can replace gelatin but requires different preparation. Fresh berries on top add a fresh contrast. Avoid freezing; refrigerate up to 4 days. Let sit at room temperature 10-15 minutes before serving for best texture.
Nutrition
- Serving Size: 1/8 of cheesecake
- Calories: 320
- Sugar: 10
- Fat: 28
- Carbohydrates: 12
- Protein: 6
Keywords: no-bake cheesecake, Basque cheesecake, burnt caramel, creamy dessert, easy cheesecake, Japanese dessert