“You want to try this paleta?” my neighbor asked one scorching afternoon, holding out a bright reddish popsicle that looked as inviting as a sunset in a glass. I was skeptical at first—tamarind in a popsicle? Honestly, I wasn’t sure if my taste buds were ready for that tangy punch. But after one lick, the sweet-and-sour burst reminded me of lazy summer days back in Mexico where street vendors would sell these icy treats that made the heat bearable and the mood instantly lighter.
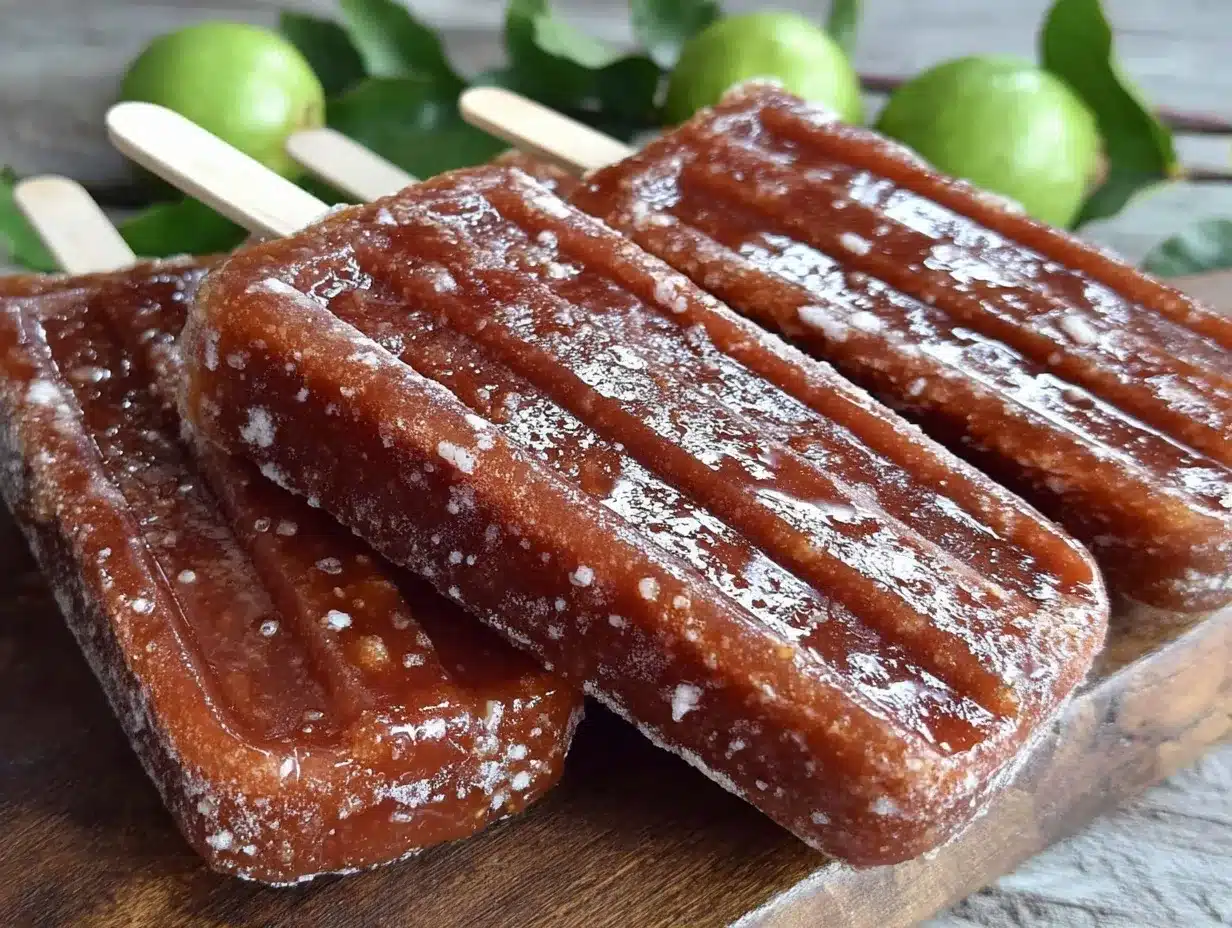
I ended up making these Refreshing Mexican Paletas de Tamarindo Homemade Popsicles multiple times that week—enough to know just how simple and satisfying they are. The perfect marriage of tart tamarind with just a touch of sugar, frozen into a popsicle that feels both nostalgic and fresh. There’s something about that deep, earthy tang that wakes you up without overwhelming your palate, and honestly, no store-bought popsicle has ever come close.
What stuck with me was how easy these paletas are to whip up at home with minimal ingredients, yet they deliver that authentic, bold flavor you crave on a blistering day. Plus, making them yourself means you control the sweetness and can skip any artificial colors or preservatives, which just feels better. So, here’s the recipe that turned me from a skeptic into a full-time fan—one refreshing lick at a time.
Why You’ll Love This Recipe
Having tested this recipe over several hot afternoons, I can confidently say these paletas are a keeper. Here’s why they’re worth adding to your summer lineup:
- Quick & Easy: Ready in under 10 minutes of prep, perfect for those sudden heatwaves or last-minute snack cravings.
- Simple Ingredients: Tamarind paste, water, sugar, and a pinch of salt—pantry staples that don’t require a trip to a specialty store.
- Perfect for Summer Gatherings: Whether it’s a backyard BBQ or a kid’s birthday party, these paletas are a hit for all ages.
- Crowd-Pleaser: The balance of sweet and tart keeps everyone coming back for more—no leftovers here.
- Unbelievably Delicious: The texture is smooth but icy, and the flavor is vibrantly refreshing without being overpowering.
What sets this recipe apart is the way it respects the traditional tamarind flavor while making it approachable for a modern kitchen. Instead of just dumping tamarind paste in, I blend it with water to get that perfect tangy base, then sweeten it just right so it’s not a puckering shock. I’ve also found that a tiny pinch of salt deepens the flavor, making it pop in a way store-bought paletas rarely do. This isn’t your average popsicle—it’s a little piece of Mexican summer in your freezer.
Honestly, it’s the kind of treat that makes you pause and smile, even on the busiest of days. And if you ever find yourself juggling dinner plans and dessert, these paletas are a no-fuss way to impress without stress (kind of like my quick cheesy taco pasta that’s always on speed dial).
What Ingredients You Will Need
This recipe uses simple, wholesome ingredients to deliver bold flavor and satisfying texture without the fuss. You likely have most of these in your kitchen or can find them easily at your local store.
- Tamarind paste – about 1/2 cup (look for brands like “Concha y Toro” or “Tamarindo La Costeña” for authentic flavor)
- Water – 3 cups (to dilute and balance the tamarind’s intensity)
- Granulated sugar – 3/4 cup (adjust based on your sweetness preference; organic cane sugar works great)
- Fresh lime juice – 2 tablespoons (adds brightness and a slight zing)
- Pinch of salt – just a tiny bit to enhance overall flavor
Optional:
- Chili powder or Tajín – sprinkled on after freezing for a spicy kick
- Fresh mint leaves – blended in for a refreshing twist
If you can’t find tamarind paste, tamarind concentrate or even tamarind pods soaked and strained can work, but paste is easiest and most consistent. For a dairy-free or vegan treat, this recipe is naturally free of animal products, so no substitutions needed there. If you want a lower-sugar version, try reducing the sugar by a quarter cup and see how you like it—tamarind’s natural tartness shines through.
Equipment Needed
- Blender or Food Processor: To mix tamarind paste smoothly with water and lime juice. I’ve tried both, and a blender gives a silkier texture.
- Mixing bowl: For combining ingredients before pouring them into molds.
- Popsicle molds: Essential for shaping and freezing the paletas. You can also use small paper cups with wooden sticks as a budget-friendly alternative.
- Measuring cups and spoons: For precise ingredient amounts—especially important with tamarind and sugar balance.
For the molds, I prefer silicone ones because the paletas pop out easily without cracking. If you only have metal or plastic molds, just run warm water quickly around the outsides before unmolding. Keeping your blender blades sharp and clean helps prevent any gritty texture from tamarind fibers, so a quick rinse right after use does wonders.
Preparation Method
- Mix Tamarind and Water: In your blender, combine 1/2 cup tamarind paste with 3 cups of water. Blend on high for about 1 minute until smooth. You’ll notice the pulp breaks down and the mixture turns a deep reddish-brown.
- Strain the Mixture: Pour the tamarind blend through a fine mesh sieve into a large bowl to remove any leftover fibers or seeds. Use a spatula to press the pulp against the mesh for maximum juice extraction. This step ensures your paletas have a smooth texture.
- Add Sugar, Lime, and Salt: Stir in 3/4 cup sugar, 2 tablespoons fresh lime juice, and a pinch of salt until the sugar fully dissolves. Taste the mixture and adjust sweetness or tartness at this point. It should be tangy but not mouth-puckering.
- Pour into Molds: Carefully fill your popsicle molds, leaving a little space at the top for expansion. Insert sticks and tap the molds gently on the counter to remove air bubbles.
- Freeze: Place the molds in the freezer for at least 6 hours or overnight. For best results, freeze on a flat surface to keep paletas straight.
- Unmold and Serve: To remove paletas, briefly dip the molds in warm water for 10 seconds to loosen them. Pull gently on the sticks and enjoy your refreshing treat!
Pro tip: If you want a little texture, stir in some chopped chili or a sprinkle of chili powder before freezing for a spicy surprise that contrasts beautifully with the tamarind’s tang.
Cooking Tips & Techniques
When making these paletas, a few tricks can make all the difference. First, straining the tamarind mixture is non-negotiable if you want that perfect smooth bite—nobody likes unexpected seeds or pulp chunks in a popsicle. I learned this the hard way after one too many chewy surprises!
Also, balancing the sugar is key. Tamarind can be wildly tart, so start with less sugar and taste as you go. You can always add more, but you can’t take it out once mixed in. Using fresh lime juice brightens the flavor, but don’t skimp or the paletas may taste flat.
Freezing time matters too. Rushing the process can result in icier textures and less flavorful paletas. Patience here pays off with popsicles that feel creamy and smooth despite being fruit-based. If you’re in a hurry, chilling the mixture in the fridge first before freezing helps speed up the process without sacrificing texture.
Lastly, if you want to get creative, you can layer flavors by freezing a tamarind layer, then adding a mango or chili layer on top, similar to how I sometimes switch up flavors in my shrimp tacos—it adds visual appeal and flavor complexity without extra work.
Variations & Adaptations
These paletas are versatile and welcome a few tasty twists depending on your mood and pantry:
- Spicy Tamarind: Mix a teaspoon of chili powder or Tajín into the tamarind base before freezing for a traditional Mexican street food vibe.
- Fruity Fusion: Add pureed mango or pineapple to the tamarind blend for a tropical punch and a sweeter finish.
- Herbal Hint: Blend in fresh mint or basil leaves for a refreshing herbal note that cuts through the tartness.
- Low-Sugar Option: Substitute sugar with honey or agave syrup, but reduce the amount slightly to avoid over-sweetening.
- Dairy Twist: Stir in a splash of coconut milk or cream for a creamy texture and subtle richness, transforming the paletas into a semi-frozen dessert.
Personally, I once tried adding a pinch of cinnamon and it gave the paletas a warm, spicy undertone that was surprisingly addictive—kind of like how I sometimes tweak my garlic butter Tuscan shrimp pasta with unexpected spices. Feel free to experiment and find your favorite combo!
Serving & Storage Suggestions
These paletas are best enjoyed straight from the freezer, on a hot day when you need something quick and cooling. Serve them as a refreshing dessert after a spicy meal or as a snack during afternoon downtime. They pair wonderfully with light dishes like grilled corn or even a quick lemon chicken and rice for a complete summer vibe.
Store paletas in their molds or transfer to an airtight container to avoid freezer burn. They keep well for up to two weeks, though honestly, they rarely last that long in my house! To re-soften slightly before eating, leave them out for 2-3 minutes or run the mold under warm water briefly.
Over time, the flavors can deepen and mellow, making them an even more enjoyable treat a day or two after freezing. Just keep an eye on freezer freshness and avoid refreezing once thawed.
Nutritional Information & Benefits
Each paleta contains roughly:
| Calories | Carbohydrates | Sugar | Fat | Protein |
|---|---|---|---|---|
| 70 | 18g | 15g | 0g | 0g |
Tamarind is rich in antioxidants and provides a good source of vitamin C and potassium. It’s also known to aid digestion, making these paletas a light, tummy-friendly treat during hot days. Since the recipe is naturally fat-free and can be made gluten-free, it fits well into many dietary plans.
For those watching sugar intake, adjusting the sweetness or using natural alternatives like agave can make these even healthier. Plus, making them at home means no artificial additives or coloring—just honest, refreshing flavor. From my own health-conscious perspective, they’re a guilt-free indulgence that satisfies without weighing you down.
Conclusion
These Refreshing Mexican Paletas de Tamarindo Homemade Popsicles have become my go-to when the temperature climbs and I want something that’s both cooling and full of character. The ease of prep combined with the bold, tangy flavor makes them a standout, especially compared to ordinary frozen treats.
The best part? You can tweak them endlessly—spicy, sweet, herbal, or creamy—whatever fits your mood or occasion. They’ve earned a permanent spot in my freezer and I hope you’ll find them as delightful and dependable as I do.
If you try this recipe, I’d love to hear how you make it your own or what variations you come up with—sharing those little tweaks is what makes cooking fun. So go ahead, beat the heat with a paleta that’s refreshingly authentic and totally homemade.
FAQs
- What is tamarind paste, and where can I find it?
Tamarind paste is a thick, tangy concentrate made from tamarind fruit. You can find it in most grocery stores with an international aisle or at Latin American markets. - Can I use tamarind concentrate instead of paste?
Yes, but tamarind concentrate is stronger, so use a smaller amount and dilute accordingly to avoid overpowering the paletas. - How long do these paletas last in the freezer?
They keep well for up to two weeks if stored in airtight containers or molds to prevent freezer burn. - Can I make these paletas without a blender?
You can whisk the tamarind paste with water vigorously, but a blender gives a smoother texture and better flavor extraction. - Are these paletas suitable for kids?
Absolutely! You can omit any chili powder or spicy add-ins to keep them kid-friendly and sweet-tart.
Pin This Recipe!
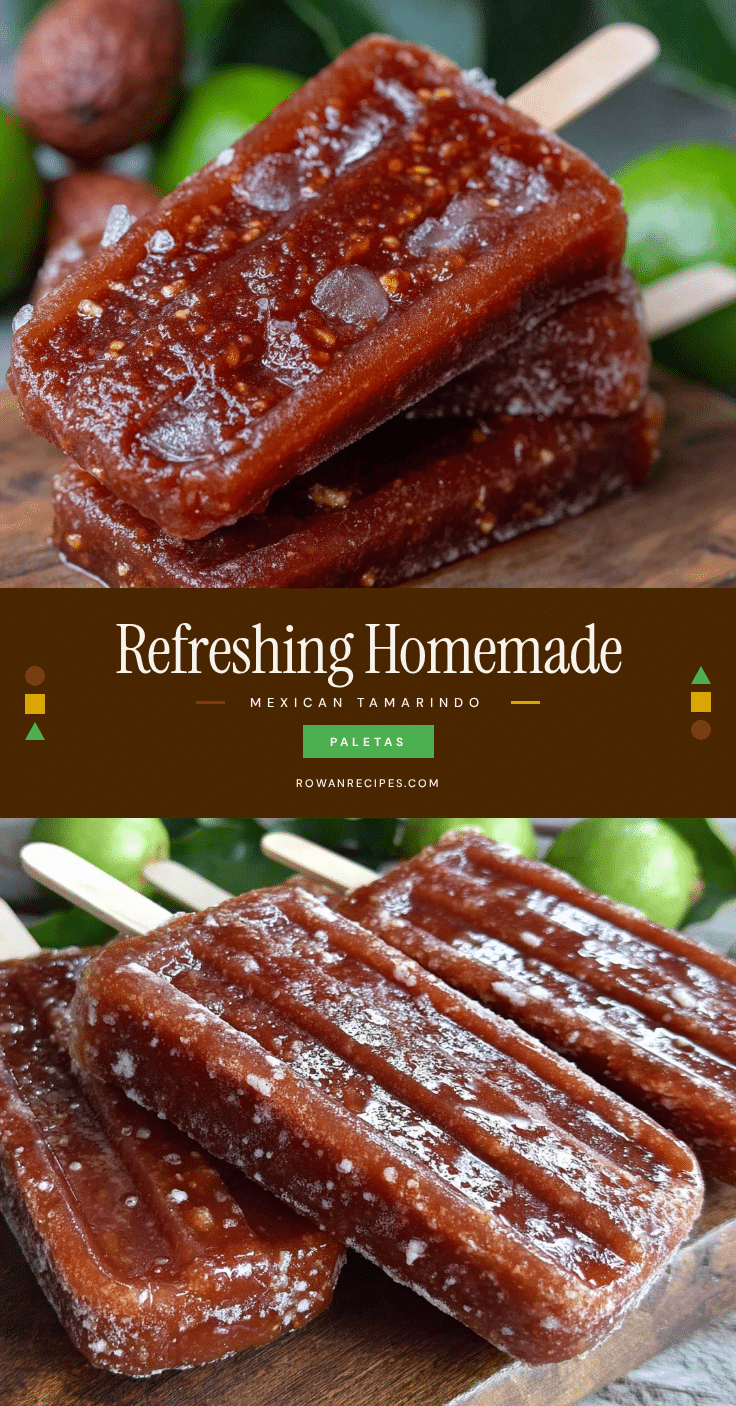
Refreshing Mexican Paletas de Tamarindo
These homemade tamarind popsicles offer a perfect balance of sweet and tart, delivering a refreshing and authentic Mexican treat that’s easy to make and perfect for hot days.
- Prep Time: 10 minutes
- Cook Time: 6 hours
- Total Time: 6 hours 10 minutes
- Yield: 8 servings 1x
- Category: Dessert
- Cuisine: Mexican
Ingredients
- 1/2 cup tamarind paste
- 3 cups water
- 3/4 cup granulated sugar
- 2 tablespoons fresh lime juice
- Pinch of salt
- Optional: chili powder or Tajín for sprinkling after freezing
- Optional: fresh mint leaves for blending in
Instructions
- In a blender, combine 1/2 cup tamarind paste with 3 cups of water. Blend on high for about 1 minute until smooth.
- Pour the tamarind blend through a fine mesh sieve into a large bowl to remove any leftover fibers or seeds. Use a spatula to press the pulp against the mesh for maximum juice extraction.
- Stir in 3/4 cup sugar, 2 tablespoons fresh lime juice, and a pinch of salt until the sugar fully dissolves. Taste and adjust sweetness or tartness as desired.
- Carefully fill popsicle molds, leaving a little space at the top for expansion. Insert sticks and tap molds gently on the counter to remove air bubbles.
- Freeze the molds on a flat surface for at least 6 hours or overnight.
- To unmold, briefly dip molds in warm water for 10 seconds, then gently pull on the sticks and serve.
Notes
Straining the tamarind mixture is essential for a smooth texture without seeds or pulp chunks. Adjust sugar to taste to balance tamarind’s tartness. Freeze on a flat surface for best shape. Optional add-ins include chili powder, Tajín, fresh mint, or fruit purees for variations.
Nutrition
- Serving Size: 1 paleta (popsicle)
- Calories: 70
- Sugar: 15
- Carbohydrates: 18
Keywords: paletas, tamarind popsicles, Mexican dessert, homemade popsicles, summer treats, tamarind recipe, refreshing dessert